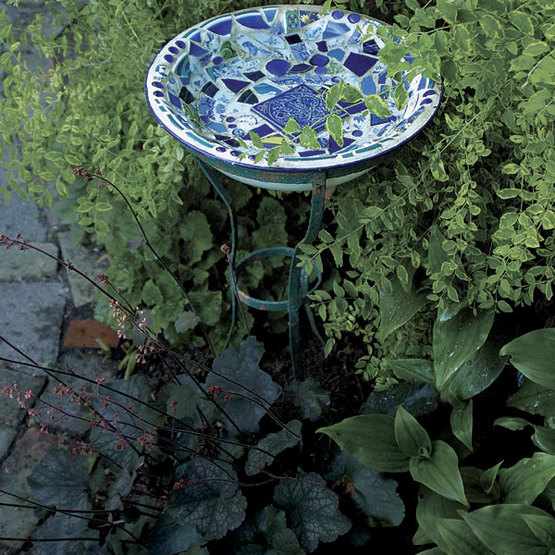
I was openly skeptical when signing up for a workshop on how to make mosaic stepping stones, since I had never even been able to assemble basic jigsaw puzzles. But peer pressure from my gardening buddies, Linda Beutler and Nancy Goldman, prevailed, and off we went to class. Within a year, my friends and I were filling our gardens at an alarming rate with objects covered in assorted bits of broken china and tile. We created colorful garden art from objects such as trowels, bowling balls, watering cans, mailboxes, birdhouses, and tables as well as bricks, concrete pavers, terra-cotta pots, and chimney flues.
By now, the word has spread among our friends about our hobby, and it’s not uncommon to come home to offerings of broken china and tile at my basement door. Several times a year we sell our wares at garden-art sales—a perfect excuse to indulge in our obsession. This craft is fun to do, keeps the three of us relatively out of trouble, and requires only simple, inexpensive household items.
Stage 1: Setup
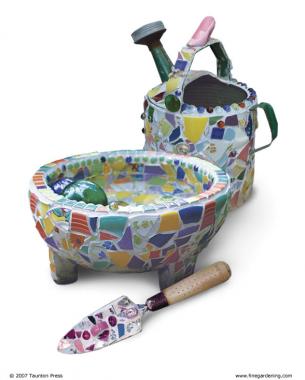
There are several things you need to do before assembling a mosaic garden ornament. Gathering and preparing the materials for use beforehand will ensure that the rest of the stages flow smoothly.
Gather your supplies
- Base object
- China and tile
- Sandpaper
- Wire brush
- Utility knife
- Safety glasses
- Hammer
- Old bath towel
- Disposable containers
- Old wooden spoons
- Thinset mortar
- Acrylic admix
- Old butter knives
- Handheld tile cutter or nippers
Select the materials
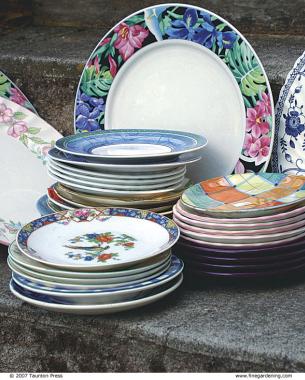
Sturdy, well-built objects made of metal, wood, terra cotta, or concrete work well as base objects for a mosaic. The decorative mosaic pieces will adhere to just about any surface except items made from flimsy plastics that bend and bow. Garage and estate sales, swap meets and flea markets, as well as thrift and secondhand stores are good places to find china for your mosaic design. Tile manufacturers often offer seconds at discounted prices, which are perfect for mosaic work.
Prepare the base object
All materials must be cleaned before the bits and pieces of china and tile are applied. Some require special preparations:
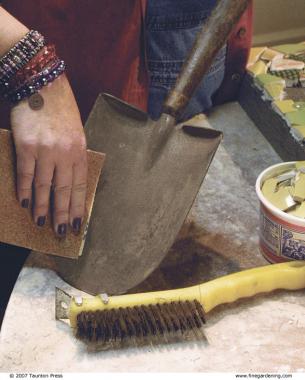
- Metal—Use sandpaper and a wire brush to remove rust and dirt from aged metal surfaces, like shovels, for better adhesion. On new metal objects, use sandpaper to rough up the surface.
- Wood—Sand and coat wood surfaces with a waterproof sealer; otherwise, the wood will absorb moisture and expand and contract, causing the mosaic work to crack.
- Rubber/plastic—Carefully score any nonporous surfaces, like bowling balls, with a utility knife so the mortar will stick.
Break the china and tile
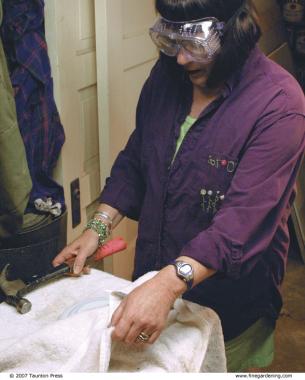
Breaking china and tile is a cathartic yet willy-nilly process since it is hard to know how the pieces will break. It’s best to work on top of a solid, flat surface; always wear safety glasses to protect against flying debris. Wrap china or tile in a bath towel, and hit it with a hammer several times. Some pieces will be harder to break than others and may require several strikes to achieve pieces of the desired size.
Gallery of ideas
When crafting mosaic ornaments, Lucy, Nancy, and I try to limit the number of colors featured on each mosaic object to two or three, plus one or two equally vivid floral or geometric patterns, since it is possible to be too garish. Rarely do we mix color values, keeping the entire project all bright or all pastel shades of the chosen color motif. With a reassembled plate design or a decorative tile in the center of our projects, we often select a solid color or a strong repeating print or texture in similar shades as a border around objects like stepping stones and water features.
To give personality to our ornaments, we include funky materials discovered during our travels. Nancy adds buttons and jewelry to her designs. I like to feature foreign coins, while Lucy uses colored-glass nuggets that add a little sparkle. We all like to try to include the china back stamps or maker’s marks, which identify where the china is from. These simple decorative additions help provide harmony in our motifs and engage our creativity with amusing juxtapositions.
—Linda Beutler, a floral designer with a whimsical sense of style who lives in Portland, Oregon
Stage 2: Mortar
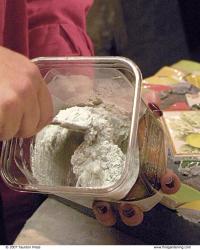
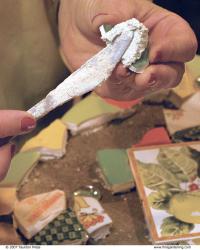
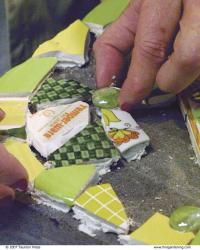
Mosaic pieces are affixed to base objects with thinset mortar mixed with acrylic admix, both of which can be found at home-improvement or hardware stores.
- Mix 2 to 3 cups of dry thinset mortar in a disposable container with small amounts of acrylic admix with an old wooden spoon until the mixture is the consistency of thick cottage cheese. It’s best to prepare small amounts of mortar as you work, since it cannot be stored once it’s mixed.
- Spread a dab of mortar on the back of a mosaic piece using a butter knife. If the mosaic piece is thin, apply additional mortar to create a level surface.
- Position the mosaic piece, applying gentle pressure to ensure good adhesion. Use your butter knife to clear away any excess mortar that has oozed out around the piece. Place the remaining mosaic pieces according to your design, making sure the pieces are close together but not touching and leaving enough space for the grout. To fit pieces into small spaces, carefully trim them down to size with handheld tile cutters or nippers.
- Set the object aside, allowing the mortar to dry for 48 hours before grouting.
Stage 3: Grout
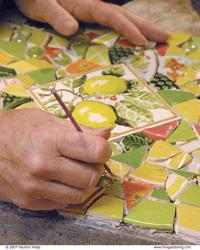
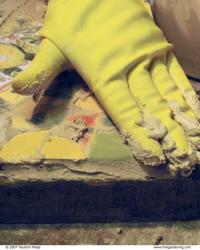
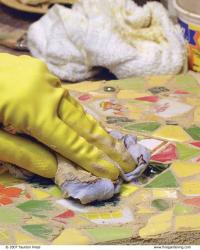
Use sanded grout, with its attractive, coarse texture, to fill in the cracks around the mosaic pieces.
- Mix 2 to 3 cups of grout in a disposable container with small amounts of acrylic admix until the consistency resembles cottage cheese. Grout is hard to mix, so persevere until all the dry particles are incorporated. Let the grout mixture sit for 10 minutes before applying.
- Pick off any mortar that has dried on the surface of the mosaic pieces with a crochet hook.
- Spread the grout over the surface into all the crevices wearing heavy-duty rubber gloves to protect your hands from sharp edges. Then scrape away any excess grout and work additional grout into any low spots with your fingers.
- Remove any leftover grout with a soft, damp rag, gently polishing each mosaic shard as you go until the entire surface is level and clean. Use a bucket of warm water to rinse the rag as you go, but don’t pour this water down the drain when finished, unless you want to grout your plumbing, too. Instead, let the water sit and the grout will sink to the bottom of the container. Then pour off most of the water and dump the grout in the trash.
- Set the grouted object aside for 48 hours before applying sealer.
Design
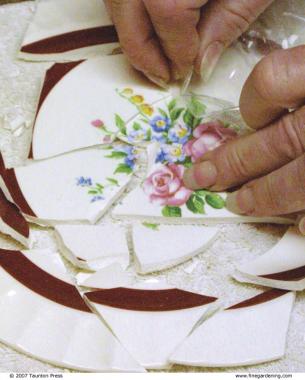
If a plate has a center design that you want to reassemble in your mosaic collage, you can break the piece in a more controlled fashion by crisscrossing the surface of the dish with clear packing tape, wrapping it in a towel facedown, and striking it several times. Then turn the piece upright, carefully remove the tape, and reassemble the pattern on a flat surface.
Stage 4: Sealer
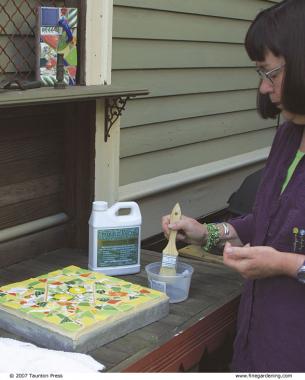
To protect objects from outdoor elements, apply two coats of tile and stone-floor sealer to the surface of the mosaic garden ornament.
Apply the sealer with a small paintbrush; do this outdoors for better ventilation. Let the first coat soak in for 10 to 15 minutes before brushing on the second coat. Buff the object with a soft towel after the sealer has dried. For added protection, reapply sealer every couple of years. If you live in an area with heavy winter rain or snow, bring your ornaments inside in the fall to protect them.
Fine Gardening Recommended Products
Coco Bliss 650gm Bricks (5-Pack) - Organic Coco Coir
Fine Gardening receives a commission for items purchased through links on this site, including Amazon Associates and other affiliate advertising programs.
Felco Pruning Shears (F 9) - High Performance Swiss Made One-Hand Left-Handed Garden Pruners
Fine Gardening receives a commission for items purchased through links on this site, including Amazon Associates and other affiliate advertising programs.






Comments
Thank you! You just got me feeling confident that I can do this! Very helpful tutorial
Log in or create an account to post a comment.
Sign up Log in