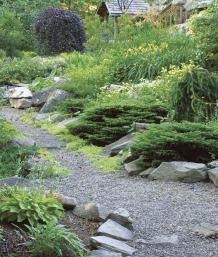
When we bought a cabin in the woods, we were thrilled about the prospect of surrounding our new home with a garden. We had fallen in love with the beauty of the exposed boulders on our land, but we soon discovered that the soil on the site was merely an inch or two of clay atop solid sandstone bedrock. Calling it “terra firma” would be a gross understatement. But, with perseverance and an openminded attitude, we learned how to transform this inhospitable site into a thriving garden.
Successes and failures lead to discovery
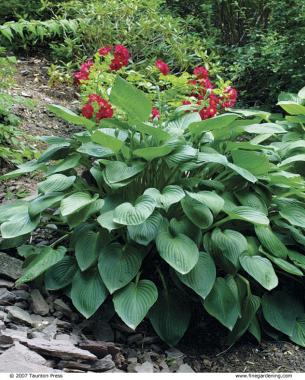
We started our first garden in an area where the previous owners had constructed a 10- by 10-foot raised bed. After removing the bed’s wooden frame and replacing it with gathered flat stone, we expanded its borders considerably and set out to plant. Oblivious to the fact that we were living on a huge expanse of rock, we gardened as we had done when we lived in the Midwest and Southwest. We chose perennials, planted them in our raised bed filled with new soil, added mulch, and then tended them.
As that first summer progressed, those perennials survived well enough. The following spring, however, we were faced with a near desert. Of the initial plantings, only some peonies (Paeonia spp. and cvs., USDA Hardiness Zones 3–8), a coreopsis (Coreopsis verticillata ‘Moonbeam’, Zones 3–8), and a rose of Sharon shrub (Hibiscus syriacus cv., Zones 5–9) had survived. We had no clue as to why some plants thrived and others did not. Over the next couple of years, we bought many more plants and nurtured each season’s scraggly survivors as best we could. As the death toll climbed, we became more and more determined to figure out a way to coax our plantings to grow.
Our gardening efforts took a turn for the better when we decided to plant a tree in memory of our dear friend Gerda, who had died. Coincidentally, we were in the process of removing an old, long-unused outhouse, which stood in an area we intended to turn into a garden. Upon removing the structure, we were thrilled to discover it had been built above a fissure between two boulders that was at least 5 to 6 feet deep and about 3 feet wide. This would become our first large planting hole. We filled this large crevice with new soil that we mixed from topsoil, sand, and aged horse manure. Then we planted a Washington hawthorn (Crataegus phaenopyrum, Zones 4–8). To our delight, the tree thrived.
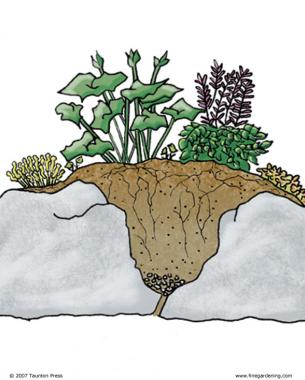
With this success, we began to analyze this crevice, following its lines to see where it went, in hopes of finding additional deep planting areas. We began to see that all the naturally occurring plants were living along these crevices. These clefts in the rock ledge measured anywhere from a few inches to several feet deep and wide. Upon further investigation, we realized that the bedrock outcroppings naturally sloped toward these crevices, depositing rainwater and nutrients there.
Armed with our new awareness, we went back to our original raised bed and shoveled the soil away from the bedrock, exposing the crevices as we went. In doing so, we discovered that our own few surviving plants had thrived because we had inadvertently placed them in or near crevices.
Inspired by these insights, our approach to gardening took a new direction. After removing the weedy mass from atop a crevice, we used hand shovels, pry bars, and our bare hands to remove the soil, gravel, and rocks that filled the fissure. Depending on the depth of an empty crevice, we sometimes used some of the rocks to backfill the area and to provide drainage. Then we filled the crevice with soil and planted.
Raised beds add more areas for plantings
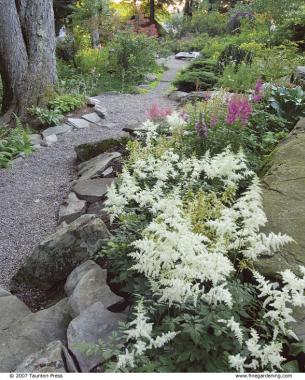
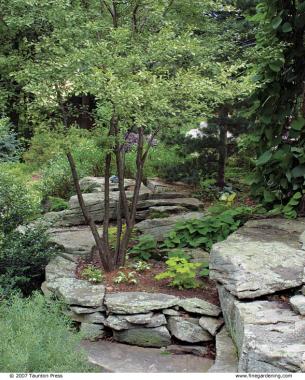
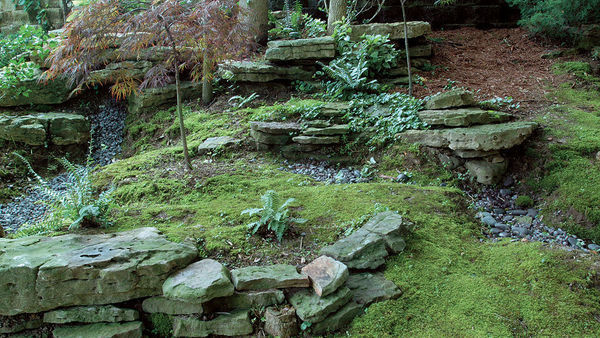
In addition to taking advantage of the depth that the excavated crevices provided, we also created extra raised beds by using flat stones to build up the soil level surrounding a crevice area (photo, right). By doing so, we were able to extend the size of planting areas while taking advantage of the increased soil depth.
Since there was very little soil on our site, we filled every planting area with soil we made ourselves. A nearby horse farm provided us with truckloads of old, ripe manure, and we bought topsoil, sand, and other materials to round out the mix. Making each batch of soil and hauling it over the rocky, multilevel landscape did, however, take its toll on us. We were going broke buying the ingredients and were getting too old to haul soil all day. To remedy this, we decided to try a method of on-site composting we discovered in a book.
All of our efforts paid off. Our plants were well nourished and grew vigorously. To increase our odds of succeeding, we invariably chose plants that we knew were fairly tough. Eventually, we connected separate planting beds into a continuous garden linked by paths.
Turning our rocky site into a lush garden has been a rewarding but slow process over the past 17 years, rather than an overnight transformation. By observing and working with the attributes of our site, we have continually evolved our gardening techniques. We recognize that in making this garden we are truly in a partnership with nature.
7 easy steps to making soil
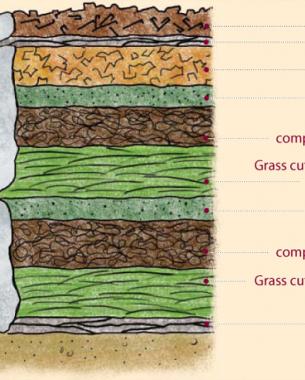
In her book Lasagna Gardening, Patricia Lanza describes a well-organized system of layering organic materials to make soil. We tend to make our “lasagna” soil more informally. Although the following steps are outlined in sequence, this method works for us even if we skip some of the later steps or vary the sequence a bit. The process usually takes at least a year to complete.
1. Smother any sod or weeds in a new garden area by placing several layers of wet newspaper on the ground.
2. Cover the area with grass cuttings, plant prunings, and weeding remnants. If you want to include small twigs and branches, cut them into 3- to 4-inch sections and scatter them evenly over the area. Over time, add kitchen scraps, including fruit and vegetable leftovers, coffee grounds and filters, eggshells, and used paper towels. (Do not include meat products since they attract animals.)
3. When you have a fairly thick and uniform layer of material to be composted—2 to 3 inches deep—add a 2- to 3-inch layer of manure or already-composted organic matter.
4. Add a 2- to 3-inch layer of peat moss.
5. Repeat steps 2, 3, and 4 until the layers measure at least 10 to 12 inches high.
6. During fall cleanup, add a layer of shredded leaves. (Unshredded leaves will also work, but they decompose more slowly.) The soil and plants from potted annuals can also be spread evenly as a layer of the “lasagna.”
7. To hasten the composting process, cover the layers with wet newspaper and mulch, such as rough wood chips. There’s no need to turn or stir the layers. Monitor the decomposition process, and begin to plant when the materials have reached the crumbly texture of loamy soil after a year or so.
—This article was written with Steve Biskey.
Fine Gardening Recommended Products
A.M. Leonard Deluxe Soil Knife & Leather Sheath Combo
Fine Gardening receives a commission for items purchased through links on this site, including Amazon Associates and other affiliate advertising programs.




Comments
Wow! Your perseverance is impressive. What a great job. You must be so satisfied with your creation. It was great to read your story.
Nice work. I have an area of my garden where the previous owners installed asphalt paving over an 10" thick layer of decomposed granite and quartz rocks. Asphalt is long gone, but dang that base rock mix is hard to garden in. It's like concrete, which I hack away at to plant. However vexing, my garden situation pales in comparison to this garden! This is an accomplishment. It looks lush, like it was there naturally. Blooming Astilbe! Hosta! All that's missing are ferns to complete the impression of a woodsy garden. Kudos.
Log in or create an account to post a comment.
Sign up Log in