
Photo/Illustration: Thomas Thorsen
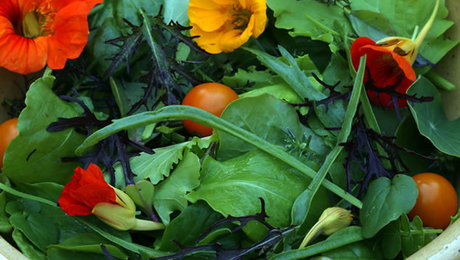
As the growing season winds down, so do the spirits of vegetable gardeners. The days are getting shorter and cooler, and there is a certain sense of relief in knowing that the season’s labor is over. But for some of us, the urge to plant a seed and watch it grow is still strong. Instead of putting the whole garden to bed, one way to balance the end-of-summer ennui with the need to keep things growing is by planting cool-season salad greens.
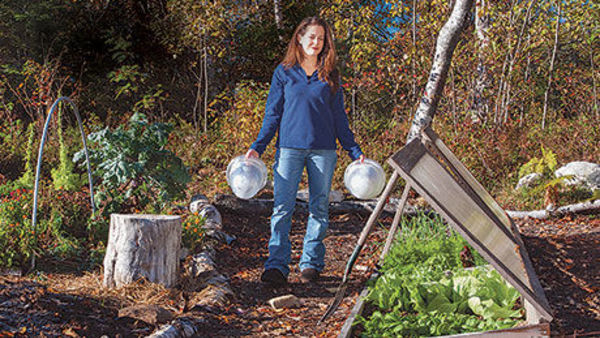
Lettuce and many other salad greens grow best in cool weather. In many regions, it is possible to plant seeds in September and have greens to harvest through December. In my Long Island garden, I plant varieties selectively bred to thrive in cool weather and, soon after planting, cover them with simple structures made from a sturdy row-cover fabric stretched over wire hoops. This system provides me with greens into December and sometimes beyond.
Peter’s picks for cool-season lettuce
These varieties have performed well for the author, producing lettuce well into December in his Zone 7 garden.
‘Arctic King’ green butterhead
‘Brune d’Hiver’ bronzy-green butterhead
‘Little Leprechaun’ semi-dwarf romaine
‘Rouge d’Hiver’ red romaine
‘Dark Lollo Rossa’ red Italian type
‘Winter Density’ green semi-cos romaine
‘Continuity Red’ red crisphead
‘Red Ridinghood’ Boston-type butterhead
Plant greens bred for cool weather

Lettuce is naturally a cool-season crop and, because of its popularity, many varieties have been bred to withstand very cold temperatures. Those that are suited to cold weather are easy to identify by names like ‘Arctic King’ and ‘North Pole’, two green butterhead-type lettuces. There is also ‘Winter Density’, one of my favorite romaine lettuces, which has been known to last almost year-round in the mountains of Vermont. I also grow ‘Winter Marvel’, a green loose-leaf lettuce that is extra cold hardy, and ‘Rouge d’Hiver’, a loose-headed romaine type with a slight red blush. Two more of my favorites are ‘Continuity Red’, a red crisphead lettuce, and the romaine-butterhead cross ‘Blushed Butter Cos’.
In addition to lettuce, I grow other cool-season greens. Kale, especially the variety ‘Winterbor’, is one of the hardiest winter greens and is by far the best performer in my winter garden. I also grow the tasty and nutritious miner’s lettuce (Claytonia perfoliata) and corn salad (Valerianella locusta), also known as mâche or lamb’s lettuce, both of which will overwinter into spring. My winter garden is never without arugula (Eruca sativa), which is at least as tough as the cool-season lettuces, and mizuna (Brassica juncea). French sorrel (Rumex scutatus) is another hardy winter green that will survive in pickable form with no more than a few fall leaves packed loosely around its roots. A smooth-leaf spinach, such as ‘Denali’, and both curly-leaf and Italian flat-leaf parsley grow contentedly under my row cover all winter.
I direct-sow the seeds for my salad plants (or plant seedlings) in September in my Zone 7 garden. Those who live in warmer or cooler areas should time planting so that the young greens can become well established before the weather cools off. If you start the plants when the weather and soil are already cold, you will have a tougher time getting them to produce for you. I don’t do anything special to the soil except to scratch in some well-rotted compost before sowing or planting to encourage good root development. The greens will need about half the amount of water they use in the summer, and they can typically get this from rain, which penetrates the row cover fabric. I also use drip irrigation to make any additional watering easier.


Row covers keep the cold out
As soon as my seeds and plants are in the ground, I cover them with row-cover fabric to insulate them. The best way to do this is to create small greenhouselike structures with wire hoops and the row cover. This heavy-duty fabric is said to protect plants to temperatures as low as 26F, but it has performed even better for me, protecting my lettuces when the nighttime temperatures have dropped to 20F. A lot depends on daytime temperatures, too, which can be warm in my sheltered garden. The row-cover tunnels trap enough warmth to offer more protection than the manufacturers claim but not so much that the plants get overheated.
Row-cover fabric, technically known as spunbonded polypropylene, is available in rolls of varying lengths and widths. I use Agribon+ AG-19, which I buy in an 83-inch-wide roll, and Typar T-518. The latter comes only in 15-foot-wide rolls, but I cut it with a razor blade, on the roll, to a more convenient size. A similar product is Agrofabric Pro-17, which is also available in 83-inch-wide rolls. All three types are sturdier than the similar but lighter-weight fabrics I use in the spring and summer for insect protection, but all of the fabrics admit rain and up to 85 percent of sunlight. With care, I can reuse these fabrics for at least three years.
To support the fabric over the plants I use 9- or 10-gauge wire hoops. This heavy wire is available in large rolls or in pre-cut 76-inch lengths. I prefer to save a bit of money by doing the cutting myself, and I have found that 63-inch lengths of wire are the right size for an 83-inch-wide row cover. First, I mark the wire with a red marker at about 8 inches from each end. This allows me to sink the ends to identical depths so that the tops of the hoops form a fairly straight line. I push one end of the wire into the soil until it reaches the red mark. With that end anchored, I hold on to the free end, bend the wire into a smooth curve, and thrust the end into the other side of the bed. To get the hoops in a straight line, so that I end up with a straight tunnel, I mark the edges of the bed with string. I place the hoops 3 feet apart, then gently stretch the row cover over the tops of the hoops.
I have often laid row covers in place by myself, but it is a lot easier with another pair of hands to help. Even the heaviest row cover will fly in a wind, so I wait for a calm day. I center the fabric over the hoops, then make a twist in one end and anchor the cover firmly at the twist with a wire pin. Then I go to the other end of the line of hoops and stretch the fabric so it fits smoothly but not tightly over the hoops and anchor it there as well. I leave an equal amount of excess fabric on each side of the tunnel so I can anchor the edges all the way around. The edges must be secure, because if wind gets under them the tunnel may fly away. To secure the fabric, I scoop a shallow furrow with a hoe and bury the edge of the fabric in the furrow. You can also use rocks, soil, or additional wire pins to secure the fabric.
When I’m ready to harvest my salad, I free the row cover along part of one side, cut the plants with a pair of scissors at soil level, and replace the cover as quickly as possible. Then I invite some friends over and impress them with a home-grown salad in the dead of winter.
Fine Gardening Recommended Products
A.M. Leonard Deluxe Soil Knife & Leather Sheath Combo
Fine Gardening receives a commission for items purchased through links on this site, including Amazon Associates and other affiliate advertising programs.
Corona E-Grip Trowel
Fine Gardening receives a commission for items purchased through links on this site, including Amazon Associates and other affiliate advertising programs.
Gardener's Log Book from NYBG
Fine Gardening receives a commission for items purchased through links on this site, including Amazon Associates and other affiliate advertising programs.





Comments
Log in or create an account to post a comment.
Sign up Log in