How to Grow Onions from Seed
Start with seeds to pick the best varieties for flavor, color, and storage
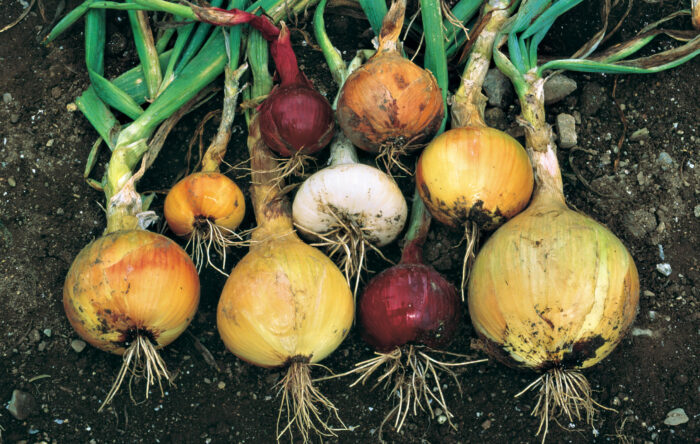
Like most gardeners, I started out growing onions from sets, which are small, immature onion bulbs. They were easy to grow, and I soon wanted to expand my variety of horizons, but with onion sets, choices were limited. So I turned to seeds. Growing from seed let me pick varieties to suit my own needs or whims—such as the desire for an early-season sweet onion or a late-season keeper. Colors range from dashing purple to pure white and numerous shades of yellow. Shapes and sizes vary, too, from the bottle-shaped ‘Italian Torpedo’ to the plump perfection of ‘Ailsa Craig Exhibition’.
Most onion experts agree that diversity aside, onions grown from seed perform better than those grown from sets. They are less prone to disease, they store better, and they bulb up faster.
I was convinced after my first year of growing onions from seed. The rewards were clear: a bin full of one of the most essential vegetables there is.
The long and short of day length
Onions need a long growing season, so place your seed orders early to get a head start. On a cold winter night, it’s great fun to browse through those seed catalogs piling up beside the sofa and choose a few new varieties.
When choosing seeds, make sure to order types suited to your climate and zone. Onion varieties differ in the length of daylight and the temperature required to make a bulb. Short-day types are ideal for the South, where they grow through cool southern fall and winter months. They’re triggered to the bulb by the 12 hours of sunlight that come with the return of warm, early summer weather.
Long-day onions are best grown in the North, where the summer daylight period is longer. These onions require at least 14 hours of light to bulb up. The plant grows foliage in cool spring weather, then forms bulbs during warm summer weather, triggered by the long days.
If short-day onions are grown in the North, they will bulb too early, then languish and never get to a good size. (This, however, might be exactly what you want for pearl or pickling onions.) On the other hand, if long-day onions are grown in the South, they’ll produce lots of leaves, but no respectable bulbs.
Starting onions seeds in flats
Lingering cold temperatures and soggy ground keep me out of the garden most years until mid-May, so I must start my seeds inside in January or February (at least two months before the last frost), or there won’t be quality bulbs at harvest, especially since I grow the large, sweet Spanish types.
I sow seeds ¼ inch deep in flats filled with soilless potting mix. I cover the flats with a plastic top to keep in moisture and place them on the heated floor of the sunroom. Onions germinate in just a week at around 70°F. Once their stringlike tops poke through the soil, I change the growing conditions. I remove the plastic top and move the flats to my cool attic where they’re placed under fluorescent lights, one warm white and one cool white bulb per fixture. I keep the lights just above the leaves, adjusting the lights as the plants grow. I feed the seedlings with a water-soluble fertilizer at half strength every other time I water, being careful not to keep them too wet. Finally, I thin them to one every ¼ inch or so.
Transplanting into six-packs
I transplant the onions into six-packs when the leaves are 5 or 6 inches tall, usually by mid-March. Of the hundreds of seedlings I transplant each spring, I dread doing those onions. I grow at least 36 plants of a half-dozen varieties, and since onion seedlings are fragile, this job is somewhat tedious. Some people skip this step by going from flats directly to the garden, but by allowing each one its own growing space, I give my onions the best possible chance for root development.
I carefully overturn the flat to expose the seedlings’ roots. Handling the plants by the leaves, I gently tug to separate the roots of individual plants. Then I tuck each plant into its new cell without damaging the long, threadlike roots.
With scissors, I snip the leaves back to about 4 inches to keep the plant from being too top-heavy and to give more nutrients to the roots instead of the leaves.
I continue watering with half-strength soluble fertilizer and keep the seedlings under the grow lights. If your weather allows, you could move your transplants to a cold frame.
Onions are cold-hardy plants and can stand chilly temperatures. Here in Maine, I usually wait until mid-April to put them in my cold frames. These are located on the south side of the garage where they receive the full sun essential for growing robust onions.
Into the ground, they go
If you are fortunate enough to have a garden you can work on early in the season, you may opt to seed your onions directly in the ground. I generally set out my transplants (also sets if I have any) mid-May, when they’re about half the size of a pencil.
Whether growing from seed, set, or a transplant, onions need soil that is high in organic matter and well-drained—no standing water after a rain. Onions prefer fertile, loose loam with a pH of 6 to 6.5. I work in a 5-10-5 fertilizer or ProGro 5-3-4, an organic fertilizer, depending on what I have on hand.
I transplant the seedlings 1⁄2 inch deep, 4 to 6 inches apart. If the mature bulb is large, I give it 6 inches; if smaller, 4 inches is adequate. Once they’re in the ground, I cut the top-heavy leaves back to 6 inches. I plant some varieties closer and thin them as summer progresses. I use thinned onions in salads and cooking.
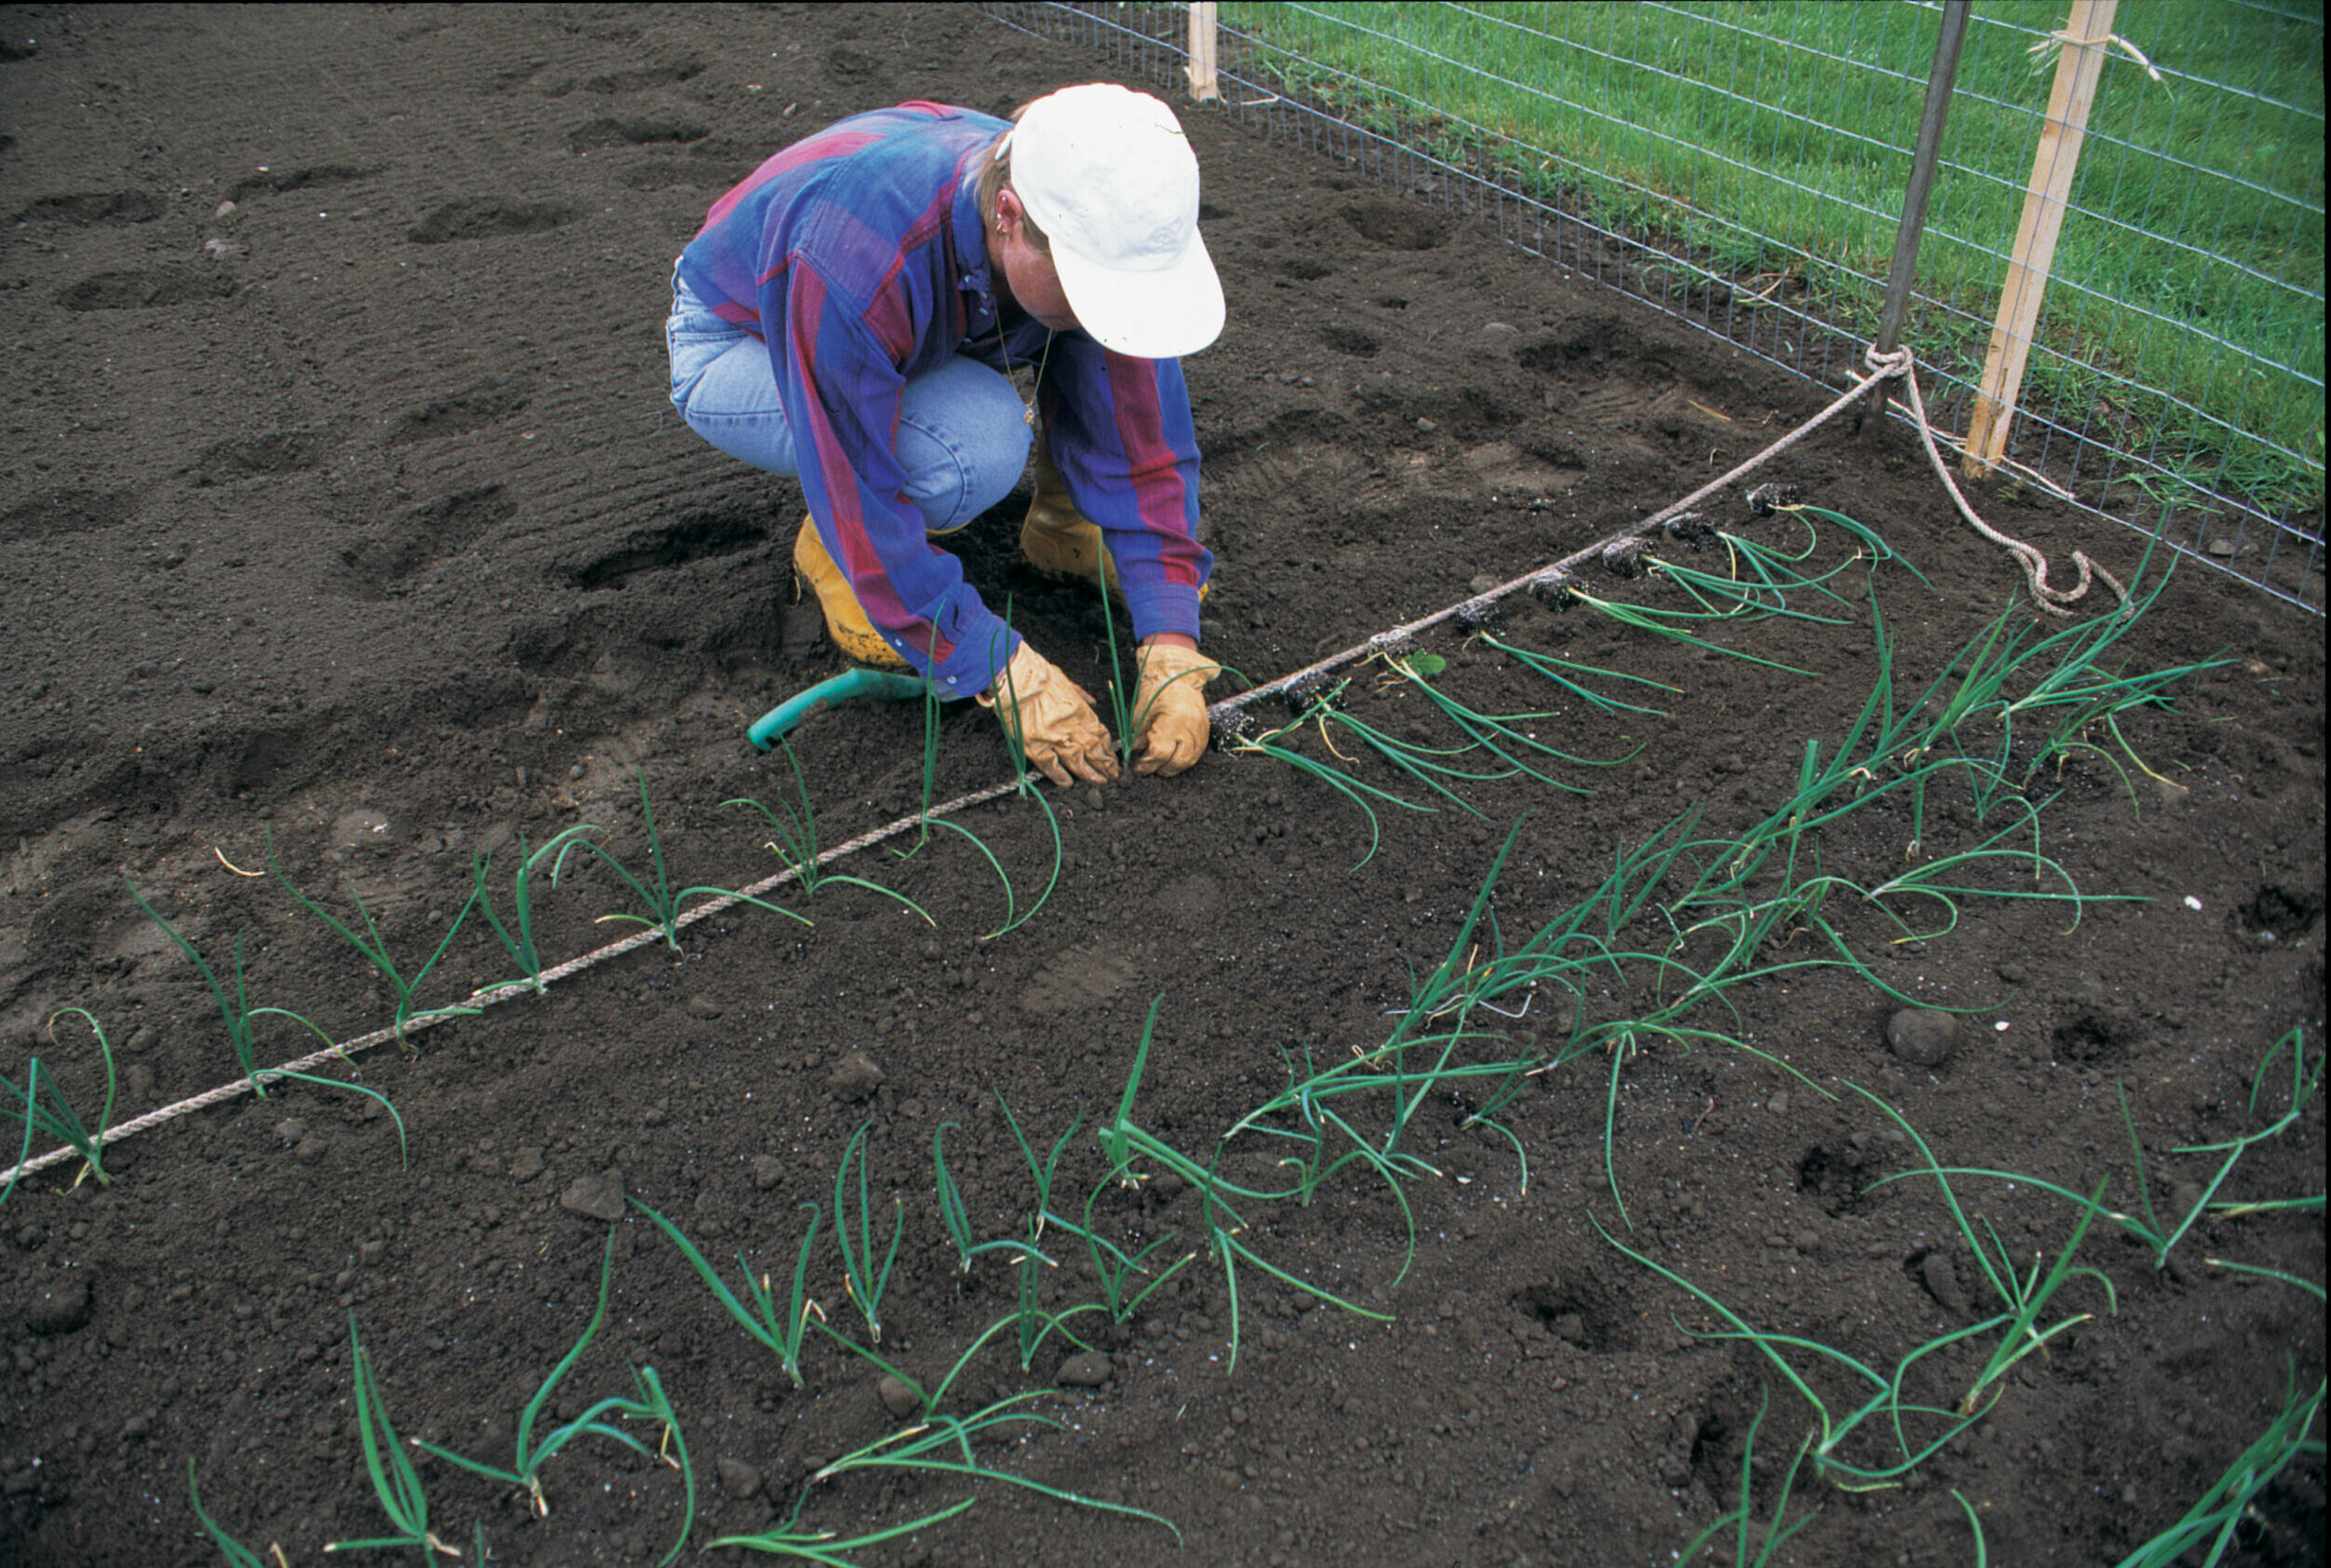
I used to plant single rows of onions. This year, though, to conserve space, I planted double rows 8 inches apart, with 1 to 2 feet between the double rows. Planting in rows, as opposed to beds, cuts down on maintenance, because rows are easier to weed. I keep onions well weeded to avoid competition for light, water, and nutrients. And I pull weeds by hand to avoid damaging the shallow onion roots.
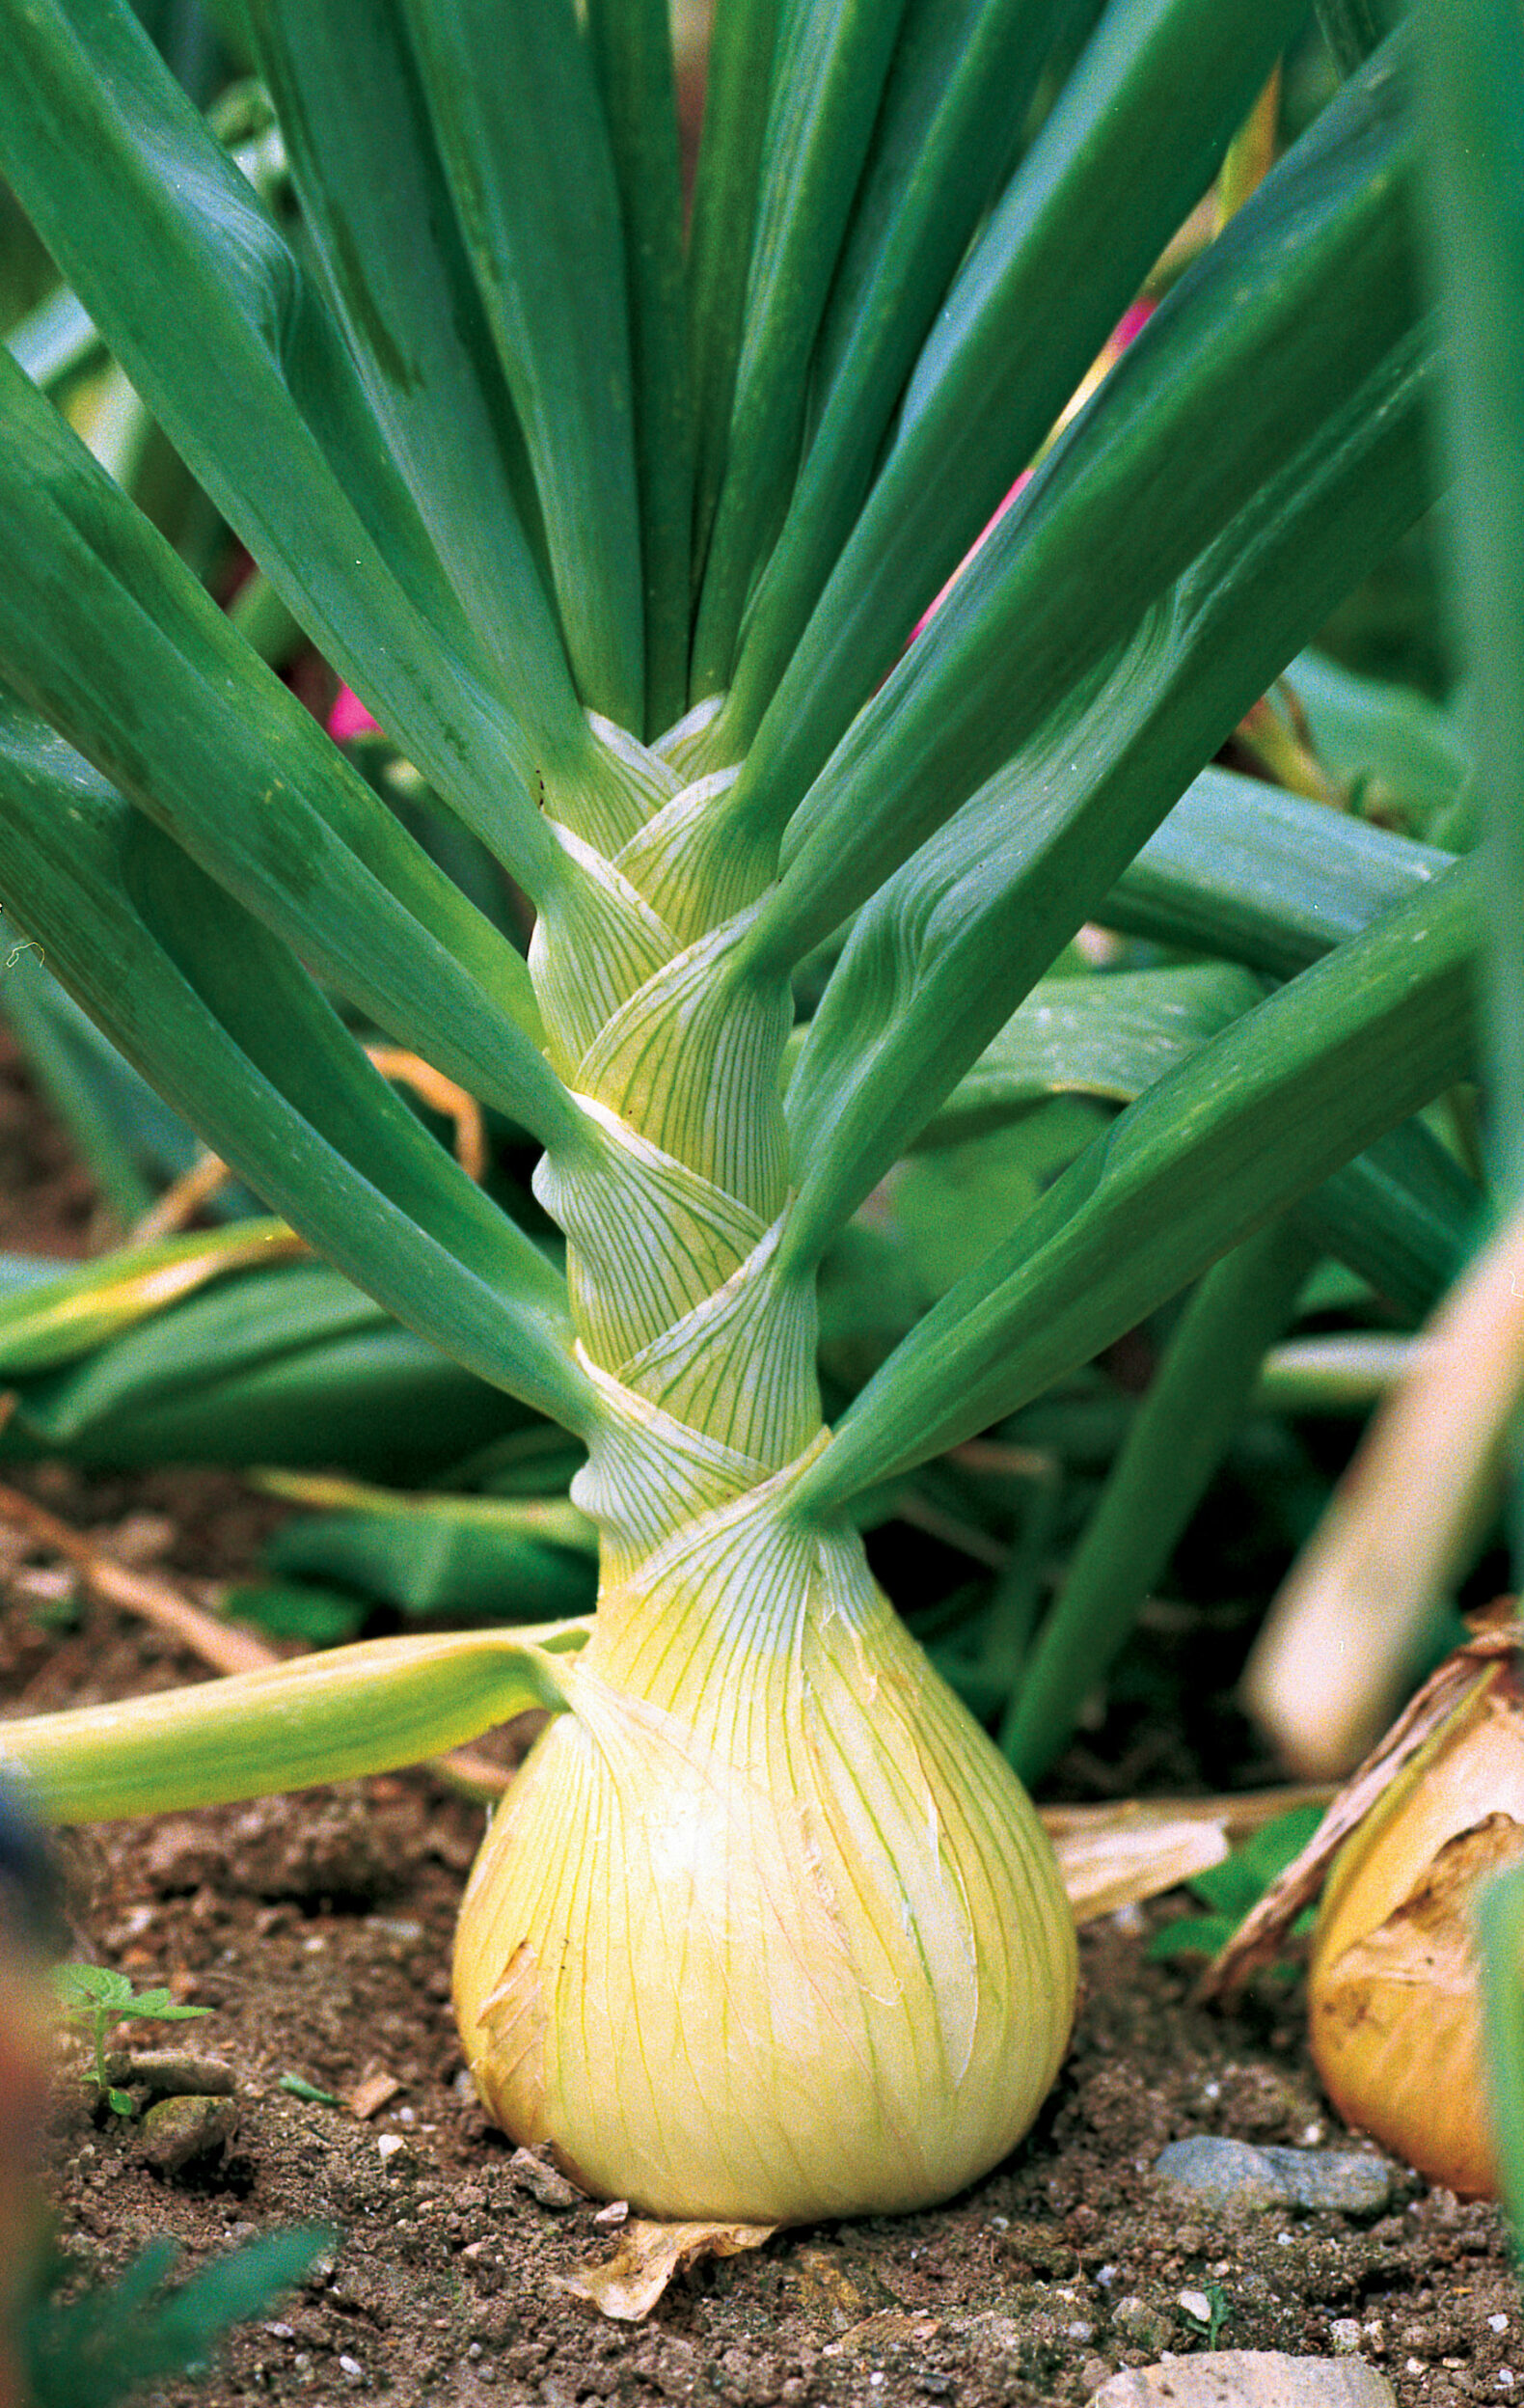
Water and nutrients are an important part of onion growing. The soil surface should be evenly moist. I give onion plants at least 1 inch of water a week, and make sure there is a constant supply of moisture during the bulb-enlarging stage. If it’s too dry and plants are grown under stress, the bulbs will be smaller and have a stronger flavor. If you have a dry season, consider mulching onions with grass clippings or leaves. Be sure to keep the mulch away from bulbs to avoid disease and rot.
Onions are heavy feeders, so besides the initial feeding at planting time, they’ll benefit from fertilizer or a side dressing of manure when the bulbs begin to swell. Give onions adequate potassium or their necks will thicken and the bulbs won’t store well. As the onions start to mature, ease up on water and fertilizer to encourage dormancy.
One more tip: As the onion matures, pull the soil away from most of the bulb, so that only the roots and the lowest part of the bulb are in contact with the dirt. It will look as if the onion is sitting on top of the soil, as it should. This will aid in the drying process by keeping moist soil away from the papery skins. To ensure healthy bulbs, rotate the crop yearly.
If onion maggots are a problem in your area, don’t plant too early in the spring, and consider using row covers to discourage the egg-laying flies. When all is said and done, onions really are an easy addition to the garden, and they are virtually pest- and disease-free.
Harvest, store, and cure
As the end of August rolls around, you should see signs that harvest time is near. At full maturity, the plants go dormant: The inner leaves stop producing blades, and the hollow-centered neck weakens, causing the tops to bend over. It is important to let the plants go dormant before harvesting, or they won’t store well. When most of the onion tops have toppled and started to brown, and the bulbs have developed skins, tipping bulbs over to break the roots will speed drying. Do not bend the tops over before maturity, as this will only invite disease.
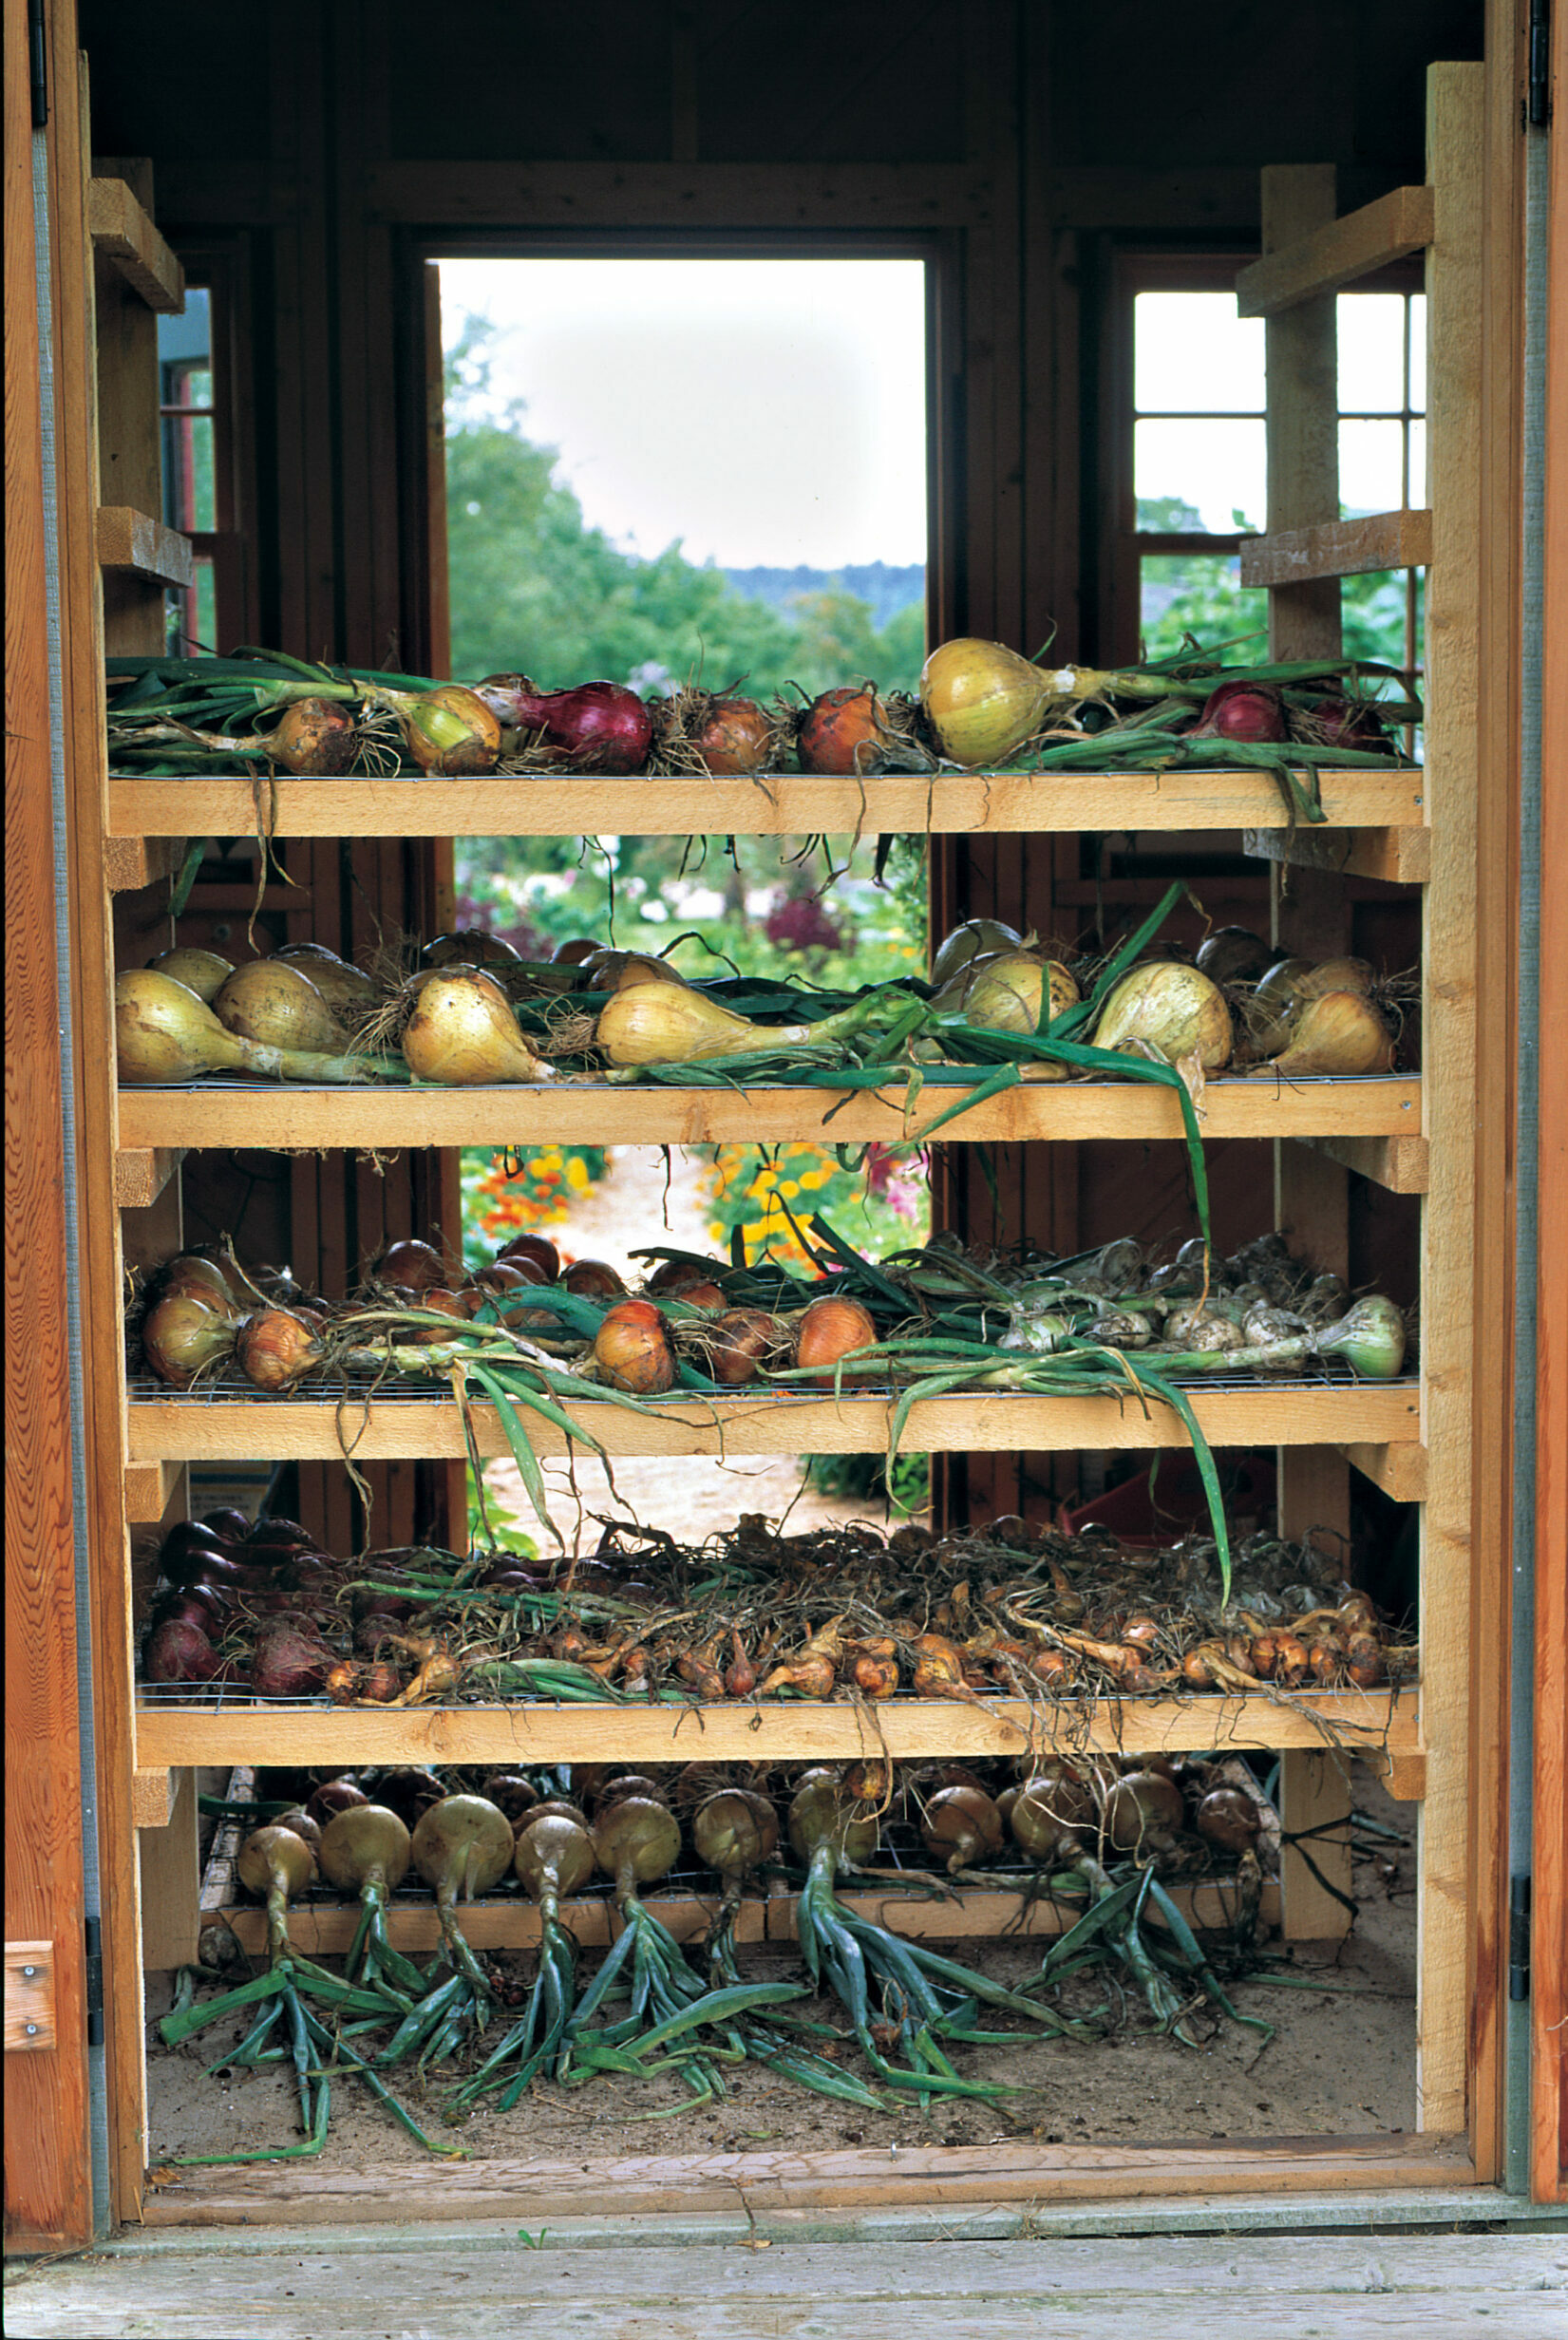
During a dry spell, after the tops have withered, pull the bulbs and place them in a warm, dry, airy location out of the direct sun and out of contact with moist soil. Curing onions in the hot summer sun will bleach and soften the outside tissue and allow the disease to enter. This is especially true for the large sweet onions, which have the greatest water content. Spreading onions out on a screen and drying them on a warm porch or in a shed or garage works well.
Onions take up to three weeks to cure before they’re ready for storing. Once the onions have dried adequately, cut the foliage back to 1 to 2 inches from the top of the bulb. (Keep the tops on if you intend to make a decorative onion braid.) Store the crop in a cool, dry location, and remember that good air circulation is a must. Onions can be stored in the traditional onion bag or in a shallow box with newspaper dividing the bulbs. Or place an onion in a pair of pantyhose and tie a knot above the onion; tie knots between each additional bulb. When you’re ready to use a bulb, cut below the knot.
Not all bulbs, however, are meant for long-term storage. The large, sweet types like ‘Lancastrian’ and ‘Ailsa Craig Exhibition’ must be used within a couple of months of harvest. Typically, onions with thick necks should be used soon, as well. Keepers have firm, dry bulbs with tight necks and layers of protective yellow or brown skin. These onions are usually pungent and sweet and become milder in time.
Onions to cry for
If you know your onions, your pantry can be well-stocked with great varieties. Good storage bulbs are essential, and ‘Copra’ keeps well through the winter, even into mid-spring. Though ‘Sweet Sandwich’ and ‘Red Baron’ are good keepers, they are especially delicious eaten fresh. The portly bulbs of ‘Ailsa Craig Exhibition’ and ‘Lancastrian’ can be conversation starters and are just plain fun to grow.
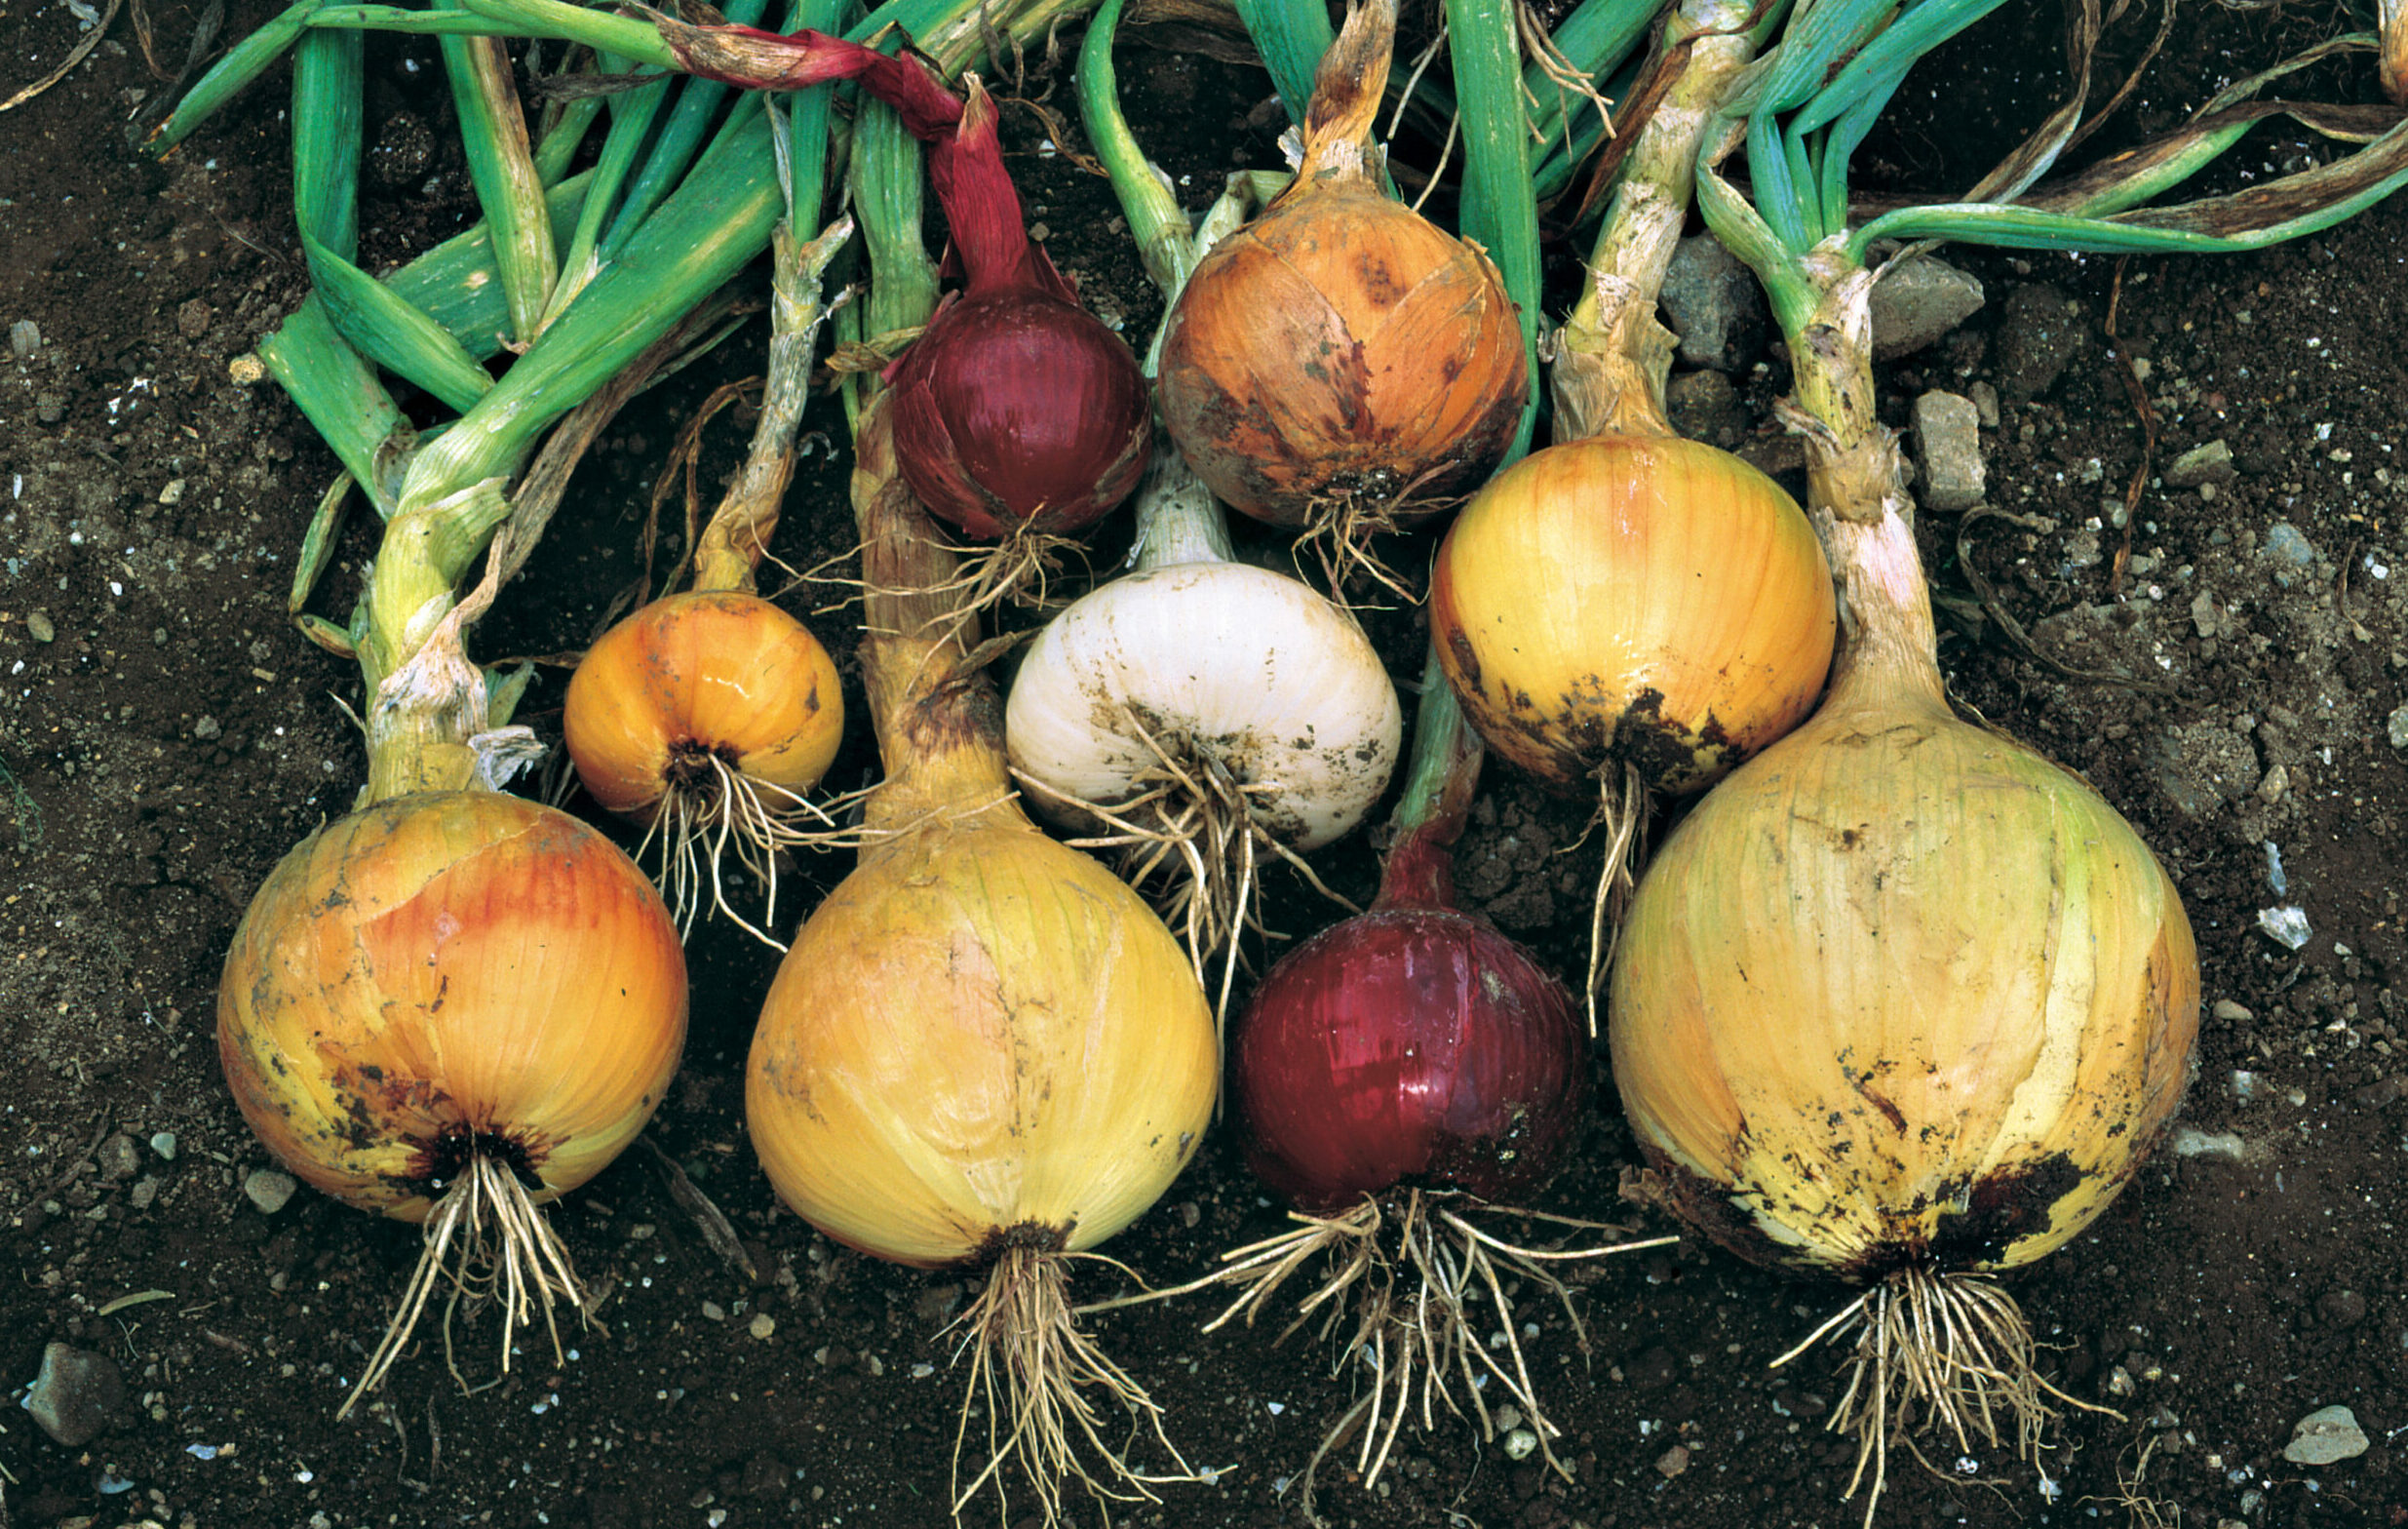
When choosing varieties, consider how you want to use onions in the kitchen, then pick the best for that purpose. For a good selection, try Johnny’s Selected Seeds or Thompson & Morgan.
‘Copra’—An early onion with medium-size, blocky globe bulbs and dark yellow skin. The rock-hard bulb makes it unrivaled for storage. It also has the highest sugar content of the storage onions. 104 days to maturity.
‘Sweet Sandwich’—Globe-shape and very sweet, especially after three months of storage. This onion is a long keeper and, as its name suggests, is excellent in sandwiches and cooking. 105 days to maturity.
‘Ailsa Craig Exhibition’—A huge, round, snow-white, mild onion with straw-yellow skin. Matures well in northern gardens. Stores into late fall. 110 days to maturity.
‘Lancastrian’—The football onion, averaging 5 lb. Crisp and sweet. Great for stuffing or onion rings. Short-term storage. 95 days to maturity.
‘Red Baron’—A large, purple-red beauty. Also good for storage. 108 days to maturity.
‘First Edition’—A medium-size onion with a pungent flavor. It’s good for storage. 105 days to maturity.
More expert advice on sowing and transplanting
Video: How to Plant Onions
Video: Starting Seed Indoors
10 Seed Starting Tips
This article originally appeared in Kitchen Gardener #23.
Fine Gardening Recommended Products
A.M. Leonard Deluxe Soil Knife & Leather Sheath Combo
Fine Gardening receives a commission for items purchased through links on this site, including Amazon Associates and other affiliate advertising programs.
Berry & Bird Rabbiting Spade, Trenching Shovel
Fine Gardening receives a commission for items purchased through links on this site, including Amazon Associates and other affiliate advertising programs.
Gardener's Log Book from NYBG
Fine Gardening receives a commission for items purchased through links on this site, including Amazon Associates and other affiliate advertising programs.



Comments
Log in or create an account to post a comment.
Sign up Log in