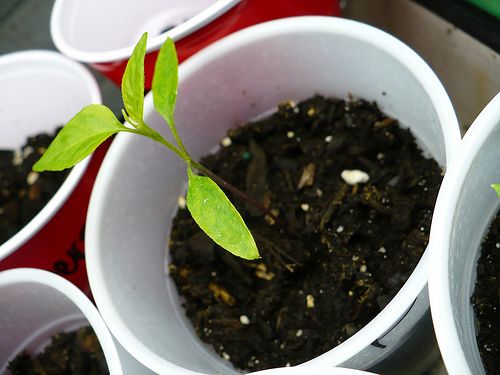
If this will be the first year that you’ll start your garden from the seed up, let’s begin at the beginning. You’re going to need the right materials to get your project off the ground. The first thing you should know is that not all seeds need to be started this early, nor do they need (or desire) to be started indoors. There are a couple of reasons for starting seeds early indoors. Usually the seeds we like to get going are those that need a lot of time in order for their fruit to become fully mature and, therefore, harvestable. Examples are tomatoes and peppers and, a few weeks after that, cucumbers and pumpkins (although both can be sown directly into the soil as well).
Learn more: Tips for Starting Annual Seeds Indoors Successfully
Other seeds that benefit from being started indoors in late winter/early spring are the cool-weather crops such as lettuce, spinach, and Swiss chard. In California, the hot weather comes on as if someone flipped a light switch, and we don’t always get much of a transition between spring and summer. Therefore, our cool-weather lovers tend to bolt quickly. If we start them early indoors, however, we get a jump on the season and are able to harvest for a longer period of time.
What you’ll need to start seeds indoors
- Seeds. You can purchase seeds, be gifted seeds, or have saved them yourself from the previous year. They can be heirlooms or hybrids, but if they weren’t collected from the previous season you may want to check for good viability (or germination). It’s easy to do: Simply dampen a paper towel, sprinkle some seeds over it, and fold the towel into quarters. Place it in a plastic baggie, and set it somewhere that’s basically warm or on a windowsill inside your home. In about a week to 10 days, the seeds will begin germinating. Decent viability means that over half of the seeds have sprouted for you. If they haven’t, find yourself some more seed.
- Seed-starter mix. The medium that is used to germinate seeds is a soilless mix. It’s usually peat moss, vermiculite, perlite, or coir depending on who makes it. In any case, the advantages are the same: good drainage, light weight, and no surprise diseases.
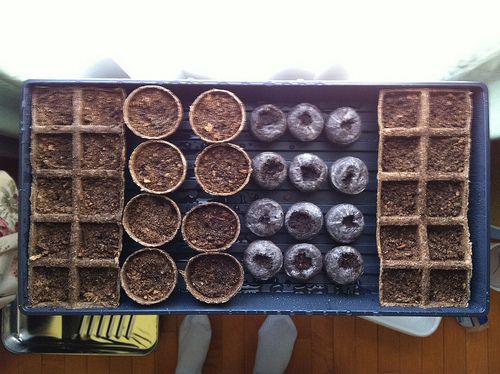
- Containers. There are many seed-starting containers to choose from; you just have to decide what works for you. There are kits containing six-cell packs that come complete with a bottom tray to catch water. There are those that come with a lid or dome to keep the soil mix moist until the seeds sprout. There are those little Jiffy pellets that expand with water, and peat pots in all sizes. You might as well know that the free stuff works just as well. Yogurt containers, egg cartons, toilet paper rolls, and newspaper pots perform the same way. The lineup just may not be as compact.
- Labels. Please don’t fall into that magical world where you actually believe that you’ll remember which tomato variety you planted where. I promise you that your memory isn’t nearly as good as you think. Label every single cell. Yes, I realize that you can get away with labeling the first of a row of seedlings. But when you transplant them into a larger pot (which happens faster than you think), the “memory game” won’t be nearly as fun as it was when you were a kid.
- Heat. You can get away with a warm room and heat from the lighting above for many seeds. I’ve had great luck starting tomatoes with no bottom heat, for instance. Peppers are another story; they really, really love heated bedding. Depending on what type of plants you’re starting, you may or may not need a source of bottom heat in the way of coils or a heat mat.
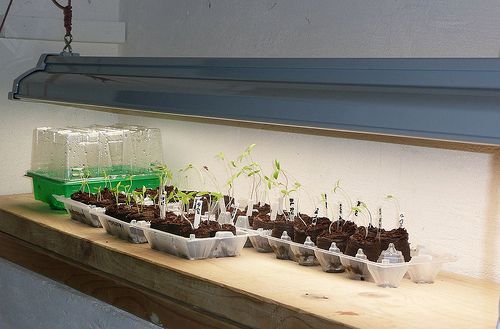
- Light. You’re going to need a light source sooner or later (after the seedlings show up), so you might as well think about it now. Let’s talk about “grow” lights for a moment. These are special lights that contain the full color spectrum. They’re also expensive. Do you need these to start seedlings if they’re going to be hardened off and live the rest of their lives outside? No, you do not. Grow lights become important when you expect a plant to continue to grow, flower, and produce right there. But they’re not necessary for starting seedlings. Grab yourself some ordinary fluorescent shop lights and fixtures, and hang them over the seedlings (very close to the top of the plants). If you hang them from chains, you can move them up little by little as the plants grow. Can you put them in a sunny window? Sure, but my experiences with this technique have always ended in leggy, wimpy plants.
- Water. You want good humidity to surround the seeds before they germinate, so keep the soil mix damp and perhaps covered with a plastic lid or something similar. Remove the lid once the seedlings have popped up, and water sparingly. Don’t let the soil dry out—but remember that overwatering can do seedlings in just as easily.
Whatever you do, feel free to experiment. This list is a basic guideline that works for most gardeners, but there’s always more than one way to get things right.
Fine Gardening Recommended Products

10 Plant Growing Trays (No Drain Holes)
Fine Gardening receives a commission for items purchased through links on this site, including Amazon Associates and other affiliate advertising programs.
Chapin International 10509 Upside-Down Trigger Sprayer
Fine Gardening receives a commission for items purchased through links on this site, including Amazon Associates and other affiliate advertising programs.
Spearhead Shade Gardening Shovel with Steel-Reinforced Fiberglass Handle
Fine Gardening receives a commission for items purchased through links on this site, including Amazon Associates and other affiliate advertising programs.






Comments
Log in or create an account to post a comment.
Sign up Log in