There is nothing less noticeable than an excellent pruning job. But on the flip side, there is nothing more noticeable than a poorly pruned plant. Pruning is a science and an art. The science involves recognizing plant flaws and skillfully eliminating or minimizing these defects. The artistic end involves removing these bad parts or pieces with a disguised grace so that the plant appears unmarred and untouched. As gardeners, though, we sometimes forget about one of these aspects when pruning, and that’s when we make mistakes.
Learn more: Pruning Shortcuts for the Busy Gardener
Everyone can relate to that feeling of panic after making a cut and realizing that you’ve just ruined the shape of your shrub. Or perhaps you’ve ignored a plant’s obvious structural problem because you were afraid or unsure of what pruning action to take. Improper pruning can lead not only to ugly plants but also to liability in the landscape. There is some recourse, thankfully, for these errors in pruning judgment. Here’s a list of the five pruning mistakes I see most often and advice on how to fix them to save your plants and your sanity.
Brush up on the Pruning BasicsHave you ever tried to read a book on pruning and felt like it was written in a foreign language? Don’t worry—you’re not alone. Here are some common terms to familiarize yourself with before your next cutting adventure:
|
Mistake #1: You keep snipping the tips of your plants to keep them in check

Why it’s bad:
We sometimes think that too many large cuts will hurt the plant but that smaller cuts won’t harm anything. In reality, snipping the tips of branches (stubbing out) is one of the worst pruning mistakes you can make. Pruning stimulates the plant to grow, so when you snip the tip of one branch, four to six new branches take its place. This abundance of new branches happens because removing the tip of the branch also removes the apical (dominant) bud, which chemically inhibits the buds below from growing. When the profusion of new branches grows, the typical response is, again, to snip off the new branches—and so the vicious cycle of snipping begins.
How to fix it:
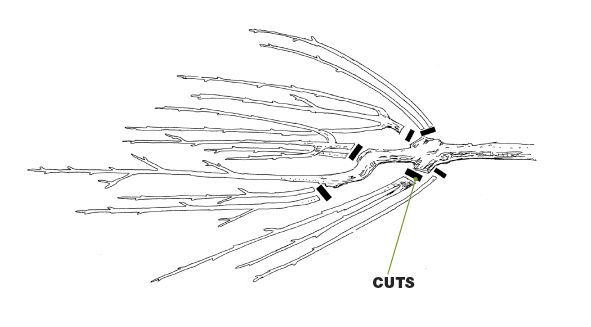
Making a few large cuts—rather than a gazillion smaller cuts—is the best strategy. But if you are in the middle of a snipping nightmare, you need to allow all the multiple new branches to grow from below the pruning cut. At the end of the growing season (late summer to early fall), select the strongest and most vigorous branch of the bunch, making sure that it is growing in a desirable direction. Remove all the other competing branches back to the trunk, if possible, or back to the main supporting limb. This will ensure that the selected branch will have a dominant bud, preventing the branches below from growing back.
Mistake #2: Your conifers are out of control in summer, so you cut back the longest branches

Why it’s bad:
It can be a pain when conifers become too large, grow too fast, or just plain get in the way. The natural reaction is to remove the portion of the limb that is causing the problem and no farther back than absolutely necessary. But this always leaves a branch stub sticking out. If pruned incorrectly, conifers rarely—if ever—recover. Most of the new growth on a conifer is generally derived from buds formed on the previous season’s growth. The new buds are mainly on the ends of the branches and expand in early spring to form the new growth (also called “candles”). Cutting back into the older wood on the branch, beyond where the new growth buds are located, usually results in a permanent stub, which is also known as an “eye gouger.” It is always brown and always ugly.
How to fix it:
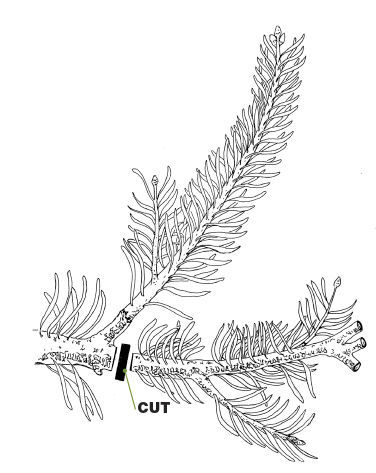
If you have a shrub or tree with branch stubs, you need to remove the stubbed-out branch all the way back to the trunk or cut back to the nearest healthy lateral branch. If pruning is done early enough, new buds will develop near the cut for the following season’s growth.
Mistake #3: You shear your weeping cherry tree so that it looks like it has a Beatle haircut

Why it’s bad:
Sometimes we see plants as geometric shapes in a landscape but forget that they grow and change. A gardener may like a plant for its color or fragrance but not its natural form. The problem is that, despite diligent pruning, the darn things keep growing into places they shouldn’t. The more you shape the plant, the denser it becomes, and eventually, it starts to die from the inside out.
How to fix it:
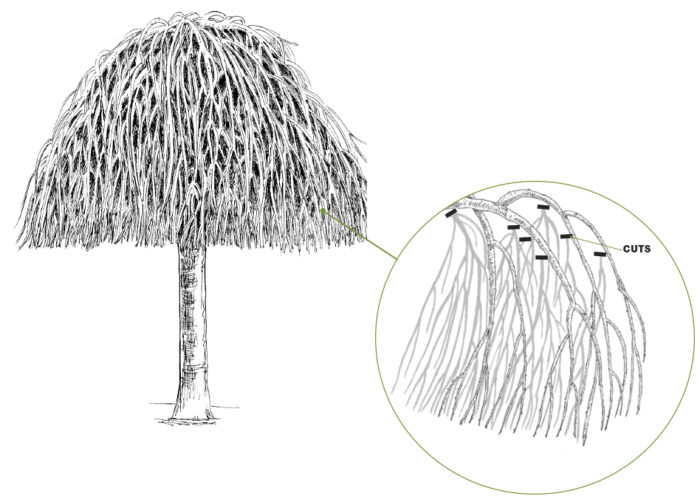
Complete removal of a plant is better than constantly fighting its natural size or shape. Remember that a plant’s growth habit is genetically predetermined and that pruning will never slow plant growth. For plants that have been subjected to years of repeated shearing and shaping, you need to selectively thin those dense areas overloaded with branches. Remove entire sections of branches back to the trunk, working from underneath and inside the plant. Leave the outfacing (scaffold) branches in place. This allows sunlight to penetrate the plant’s interior, which stimulates latent buds to grow normally rather than in a bunched-up fashion. Continue to thin and remove these dense branch clusters every year, making cuts deeper into the plant. Ideally, you’ll want to achieve a balance between the long scaffold branches and the smaller lateral branches inside.
Mistake #4: The tree in the front yard is too tall, so you chop off the top to make it stop growing up
Why it’s bad:
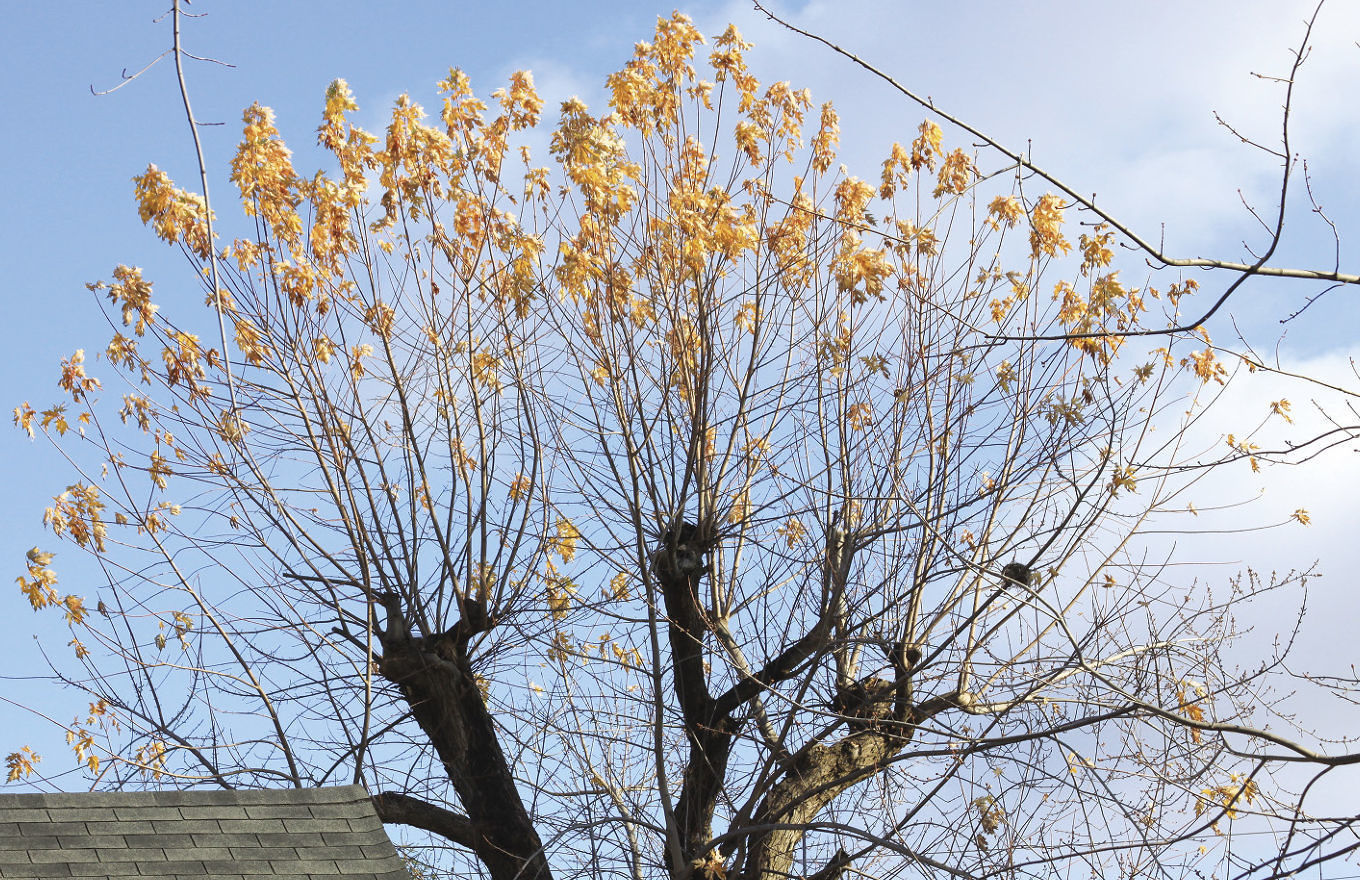
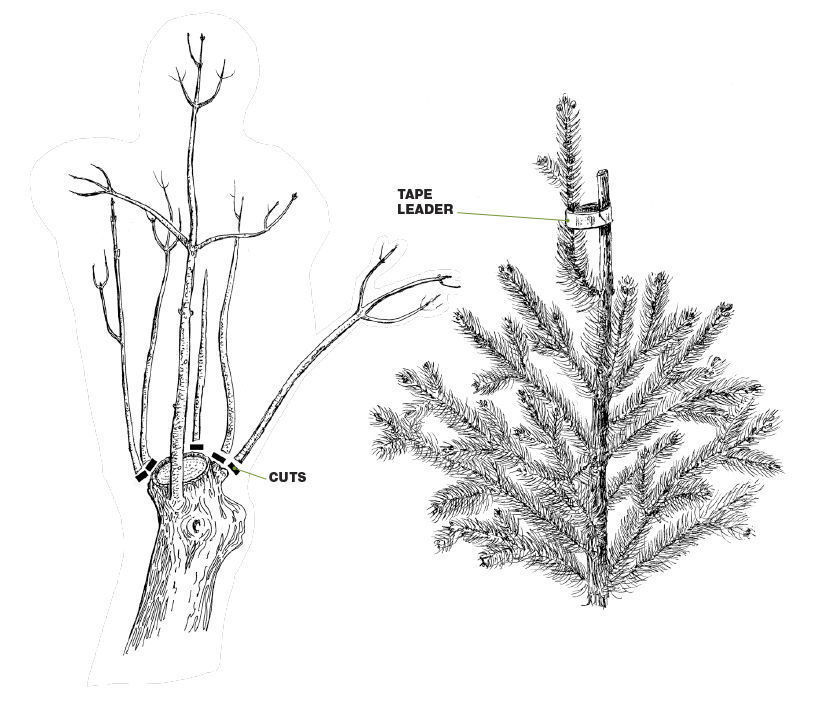
Although most topping tragedies happen because we want to maintain a plant at a specific height or to keep it from growing too fast, some plants lose their tops (main leader) due to insect damage, disease, or even heavy birds landing on tender new growth and snapping it off—it sounds far-fetched, but I’ve seen it happen. Topping plants or cutting the central leader is fine when you want to make a scrawny shrub broad and full, but it is a nightmare for trees. Removing the tops of the tree causes the tree to create several new leaders to replace the ones lost. These leaders compete with each other and compromise the structural integrity of the tree; trees with one dominant central trunk fare better when faced with wind, snow, or ice storms. Also, remember that a pyramid is the most efficient shape for harvesting sunlight and, therefore, for maintaining plant health.
How to fix it:
With deciduous trees, select and reestablish one vigorous leader. Keep this adage in mind: “Leaders lead and are the highest up.” Prune out any competing leaders or overly aggressive lower branches so that the remaining branch becomes dominant. With conifers, select the most vigorous lateral branch below the nub of the former leader and simply bend it up. Using masking tape, attach the bent lateral branch to the main stem of the tree. Masking tape is effective because it eventually breaks down, loses its adhesiveness, and drops away without girdling the newly trained leader.
Mistake #5: You decide not to prune

Why it’s bad:
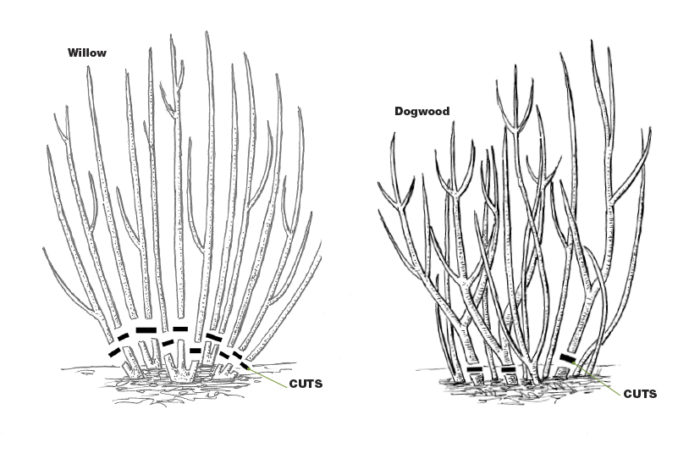
Not pruning is probably the most common pruning mistake among gardeners. Some are fearful to make drastic cuts because they think it will cause more harm than good; others worry that any pruning will leave unsightly holes or set back the growth of a plant. Years later, they can’t understand why their redtwig dogwood (Cornus alba and cvs., USDA Hardiness Zones 2–8) or ‘Flame’ willow (Salix ‘Flame’, Zones 3–6) doesn’t have brightly colored stems anymore. Without pruning, the desired coloring will disappear because it is the new growth that has the brightest hues.
How to fix it:
One word: Prune. For shrubs with intense bark colors, like shrub dogwoods and willows, you need to remove the older, colorless branches. For shrub dogwoods, these branches will be those that are more than two to three years old; for willows, every branch should be removed every year. Dogwood stems should be removed as close as possible to the base (crown) of the plant, and willow branches should be cut back to about 6 to 12 inches long. This removal stimulates the plant to produce new wood in beautiful colors.
Pruning Tip: A double leader is just as bad as no leader
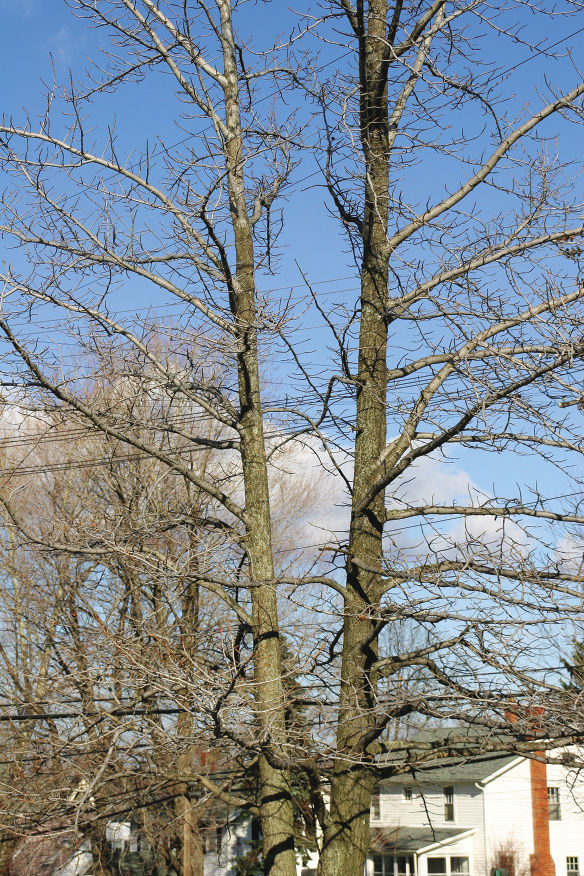
In the case of tree leaders, two is not better than one. A tree with a double leader is a huge problem because heavy branches develop on the outside of the two main stems. This weighs down the two leaders and strains the spot where they are joined, eventually splitting the tree. To fix this landscape hazard, select the strongest and straightest of the two leaders. Make a 30- to 45-degree cut on the other leader to remove it. This ensures that moisture, which causes rot, doesn’t remain on the pruning cut.
Erik Draper is a commercial-horticulture educator, assistant professor, and county office director at Ohio State University in Geauga County.
Photos, except where noted: Courtesy of Erik Draper
Illustrations: Judy Simon
Fine Gardening Recommended Products
Dramm Bypass Pruner, Cut up to 5/8-inch in diameter, Stainless Steel Blade, Blue
Fine Gardening receives a commission for items purchased through links on this site, including Amazon Associates and other affiliate advertising programs.

SHOWA Atlas 370B Nitrile Palm Coating Gloves, Black, Medium (Pack of 12 Pairs)
Fine Gardening receives a commission for items purchased through links on this site, including Amazon Associates and other affiliate advertising programs.
Pruning Simplified: A Step-by-Step Guide to 50 Popular Trees and Shrubs
Fine Gardening receives a commission for items purchased through links on this site, including Amazon Associates and other affiliate advertising programs.







Comments
Log in or create an account to post a comment.
Sign up Log in