How to Grow Beefsteak Tomatoes
Learn how to prepare the soil, choose the best varieties, plant, prune, and fight common diseases

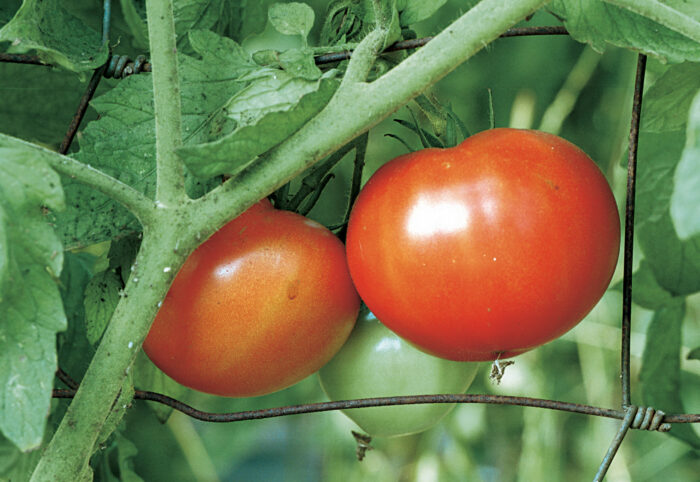
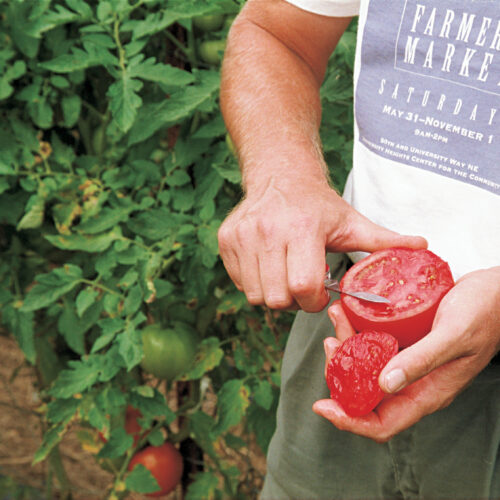
I know the image they were thinking of when they coined the term beefsteak tomato: big, thick, juicy slices the size and color of a steak. These are the attributes that make for a perfect BLT, the ultimate way to enjoy tomatoes. Of course, here in the South, making BLTs is also the forum for an argument over whether Duke’s or Hellmann’s mayonnaise is the best. This debate is often enough to start the tomatoes flying before we even get to the cutting board. There’s always full agreement, however, on using flavorful beefsteak tomatoes.
Most people classify beefsteaks based only on their shape and size: oblate, or slightly flattened, and weighing more than a pound is usually the standard. But to my mind, unless you are going for a state fair contender, huge size is not as important as flavor. For years we have searched for great flavor in a slicing tomato, but in a user-friendly size of 8 to 12 ounces.
Tomato varieties with great flavor
As with the mayonnaise debate, I am somewhat hesitant to lay my neck on the line and recommend tomato varieties, but I will tell you which ones have performed well for us. For many years, ‘Celebrity’ was the standard by which we judged all other red slicing tomatoes. It produces well and is disease resistant. Its flavor is a well-balanced combination of acidic and sweet properties.
While I would still recommend it as good tomato, I feel that the flavor is not as good as it used to be. This sometimes happens with hybrids; seed stock can get diluted over time.

A few years back, we began the search to find a suitable replacement for ‘Celebrity’. The current holder of the title is ‘Big Beef’. It is an excellent producer, is disease resistant, and in our nonrigorous taste tests it rates better than ‘Celebrity’ does. Our choice for early-season production is ‘Burpee’s Early Pick’ hybrid. It was bred for cool night conditions and has consistently produced beautiful scarlet 8-ounce fruit 60 days from transplanting. The flavor is good, more sweet than acidic.
‘Park’s Whopper Improved’ and ‘Red Sun’ are hybrids that have done well for other farmers around here but haven’t impressed us yet. ‘Red Sun’ is supposed to have equal or better flavor than ‘Celebrity’ and not be as susceptible to cracking. Still not satisfied, we have begun to try some of the many heirloom varieties now available. While usually not as disease resistant or productive as the hybrids, they offer the promise of great flavor.
The variety you grow is important for flavor, but how you grow your tomatoes will determine if you have loads of beautiful fruits or a few small fruits on weak plants. The methods we use are the keys to our success and may work for you too.
 |
Get more info on growing tomatoes • How to Support Tomatoes • Perfect Tomatoes Come from Unhurried Biochemistry |
Before planting tomatoes, amend the soil in fall
We start in the fall by choosing a site that hasn’t had tomatoes (or peppers, eggplant, or potatoes) on it for at least three years. Rotating these crops helps control soil-borne diseases. We do a soil test to make sure the pH and potassium (K) levels are where they should be. Tomatoes prefer a pH between 6.5 and 7.0, a little higher than for most other vegetables. Additionally, they need at least as much potassium as nitrogen to spur good fruit development.
If my soil test reveals that everything is reasonably balanced and all that we need to do is boost the pH and potassium levels up to tomato standards, we simply add wood ashes. Not only do they have almost the same lime equivalent (85 percent) as garden lime, but they are also about 5 percent potassium. For a normal soil, I will add 10 to 15 pounds to a 300-square-foot bed. Fall is the best time to add lime and potassium to the garden because it gives the nutrients time to spread into the topsoil. We then sow a cover crop of crimson clover and wheat and put the patch to bed for the winter.
Tips for preparing your tomato beds
In the spring, we mow the cover crop and turn it under three to four weeks before our intended planting date. Just before planting, we again till shallowly to kill any germinated weeds and to incorporate any nitrogen we need. Tomatoes need about 1¾ pounds of actual nitrogen per 500 square feet. If the cover crop grew well over the winter, I estimate that the soil will get about two-thirds of that nitrogen from its decomposition, and I will add the rest.
I prefer soybean meal as a source of nitrogen. It is readily available at farm supply stores and slow to medium in its nutrient release; I usually add 2 ounces of soybean meal per plant if the cover crop grew well. Be careful when applying nitrogen: Too much will make tomatoes grow lots of foliage, which can delay fruit set and make the plant more susceptible to foliar diseases. If you didn’t get your lime and potassium on in the fall, you can add wood ashes in the spring as well, because they are more quickly available than most lime or potassium sources.
We then install a drip irrigation line down the middle of the bed and cover the bed with black, woven landscape fabric, pinning the edges down securely. We make 4-inch holes in the fabric for planting. We prefer landscape fabric to black plastic because we get all the benefits of plastic, like smothering weeds and warming soil, but it’s reusable. And, because it’s permeable, water doesn’t puddle on top and become a catalyst for disease.
We mulch the paths with clean straw, then put up the trellis, as it’s easier to do before the plants are in. Our trellis is a simple 5-foot wire fence. If you use cages to support your tomatoes, you can plant first, then install the cages.
With succession tomato crops, you’ll get five months of harvest
We do four separate plantings each year, which allows us to have BLTs from June until October. The first planting is a small one that I make in an unheated greenhouse to get a three- to four-week jump on the season. We set out the main planting the week after the last average killing frost, which is the last week of April for us. This crop is the best performer, benefiting from warm temperatures and minimal disease and insect pressure. It will produce fruit in July and early August. We then set out two smaller plantings, one around June 1 and the other before the summer solstice. While these plantings have a harder time growing than the main crop does, they will give us tomatoes well into fall.
Here in the humid mid-Atlantic, foliage diseases are ruthless, and no matter what we do (our philosophy doesn’t embrace weekly sprays of industrial-duty fungicides), tomato plants eventually become defoliated. Instead of lots of spraying, we plan on a crop of tomatoes producing fruit for about five weeks, then it’s on to the next crop.
Space tomato plants according to type
In the wild, tomatoes are perennial vines that just grow and grow. We call this an indeterminate habit, where the stem always ends with another shoot, and the fruit clusters are spaced fairly wide apart on the stem (usually every third leaf). Most of the newer hybrids have been bred to be shorter so that it is easier to trellis them. This shorter, more-compact growth habit is known as determinate growth. The stem ends with a fruit cluster and the other fruit clusters are spaced closer on the stem, generally between every leaf.
Rows of tomatoes should be at least 5 feet apart, or wider if space allows. In the row, space the plants 18 to 36 inches apart, using the wider measurement if you use cages. We grow our tomatoes up wire fences so we can fan them out and because almost all the varieties we grow are tall, indeterminate types. We secure the vines to the fence with a plastic tie dispensed from a special hand-held gun (see the photo below right). We prefer larger, indeterminate plants because they support more and larger fruit. The fruit also tends to taste better on larger plants because more photosynthesis makes more sugars, which affects the taste of the fruit. Also, since indeterminate plants have more leaves, it takes longer for diseases to completely defoliate the plant.
There is a point early in the season when these indeterminate plants have too much plant material, and pruning may be necessary. About three weeks after transplanting, the first flower cluster appears, along with new shoots from each leaf and stem junction. Removing the new shoots at this point, when they are no larger than a pencil, will send a signal to the plant to put more resources into setting fruit. This will not yield any more fruit throughout the season, but it will give you fruit that’s a little earlier and a little larger. We remove the shoots, or suckers as they are known in tobacco country, up to and including the large one below the first flower cluster. Once the plants have set the first fruit, they are better able to balance themselves between fruit set and plant growth.
How to prune indeterminate tomato plants
Most tomato pest and disease problems are manageable
Good crop rotation, use of disease-resistant varieties, and good air circulation take care of 95 percent of our pest problems. The major antagonists are tomato fruitworms (which also go by the name corn earworm) and, to a lesser degree, beet armyworms and tobacco hornworms. Tomato fruitworms become a problem in early July, after they have had their fill of everyone’s corn. We spray reluctantly, and only if damage goes beyond our tolerance. We use Bacillus thuringiensis (Bt), a bacterium that attacks the worm’s digestive system. Most years, one or maybe two treatments do the trick.
Common leaf diseases of tomatoes
 |
 |
 |
From here on, until we begin the BLT feast, we continue to tie the tomatoes up to the trellis and make sure they have the perfect amount of water. Drip or some type of soaker irrigation is ideal because it doesn’t wet the foliage, and you can deliver regular amounts of water to the plants. Too little water can set your plants back and may lead to blossom-end rot, because the plants can’t move enough calcium up into the fruit. Too much water, especially near harvest time, can literally explode the fruit right off the plants. Once the fruits start to turn color, excess water will cause the skin to split or crack, because it has stopped growing.
The end of May finds us sneaking away from our work, eagerly looking for the first ripe fruits. At our house, we eat tomatoes at almost every meal and in an endless number of ways. But many times a week I find myself at the cutting board with slices of bread, juicy red tomatoes, and mayonnaise, though which brand it is I will not divulge.
Photos, except where noted: Marc Vassallo
Fine Gardening Recommended Products

Sun Joe Cordless Telescoping Pole Chain Saw
Fine Gardening receives a commission for items purchased through links on this site, including Amazon Associates and other affiliate advertising programs.

Chapin International 10509 Upside-Down Trigger Sprayer
Fine Gardening receives a commission for items purchased through links on this site, including Amazon Associates and other affiliate advertising programs.

Dewit 3-Piece Tool Gift Set with 3-Tine Cultivator, Forged Trowel and Forged Hand Fork
Fine Gardening receives a commission for items purchased through links on this site, including Amazon Associates and other affiliate advertising programs.


Comments
Log in or create an account to post a comment.
Sign up Log in