How to Support Tomatoes
Provide your plants with some structure for easier harvesting, bigger fruits, and a better yield
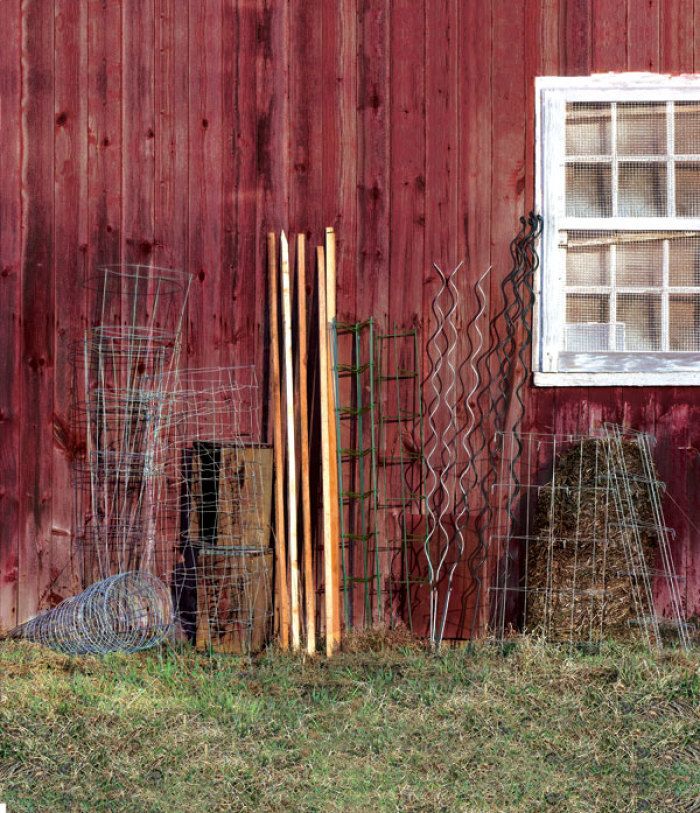
Summer would simply not be summer without lots of tomatoes. To keep my tomato plants happy and productive I give them the necessities of life: food, water, and light. But, for the greatest yields, they also require that I provide some means of support or trellising. Lifting and supporting the plants keeps the fruit clean and away from pests, provides better air circulation to help prevent disease, and makes it easier to see and harvest the fruit. I can also fit more plants into a smaller area by trellising them. All this translates into more and better tomatoes. During my many summers of tomato fixation, I’ve tried and observed many types of tomato supports and have found several tried-and-true structures that are readily available, dependable, and sure to keep the garden looking attractive and orderly.
Simple tomato cages are easy to find
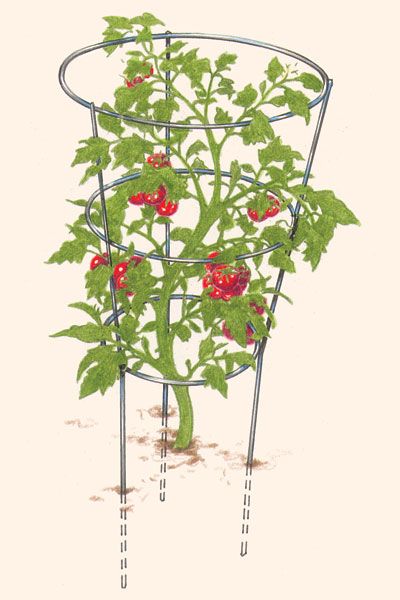
Tomato cages, structures that entirely encircle a plant, are the easiest supports to use. There are several variations of cages available, but if you’re going to be growing just a few plants, the easiest cage to find is the ubiquitous, inexpensive, cone-shaped, heavy-gauge-wire “tomato basket.” These cost just a couple of dollars each, and in the spring I see them for sale everywhere from nurseries to drugstores. You simply push the legs into the soil around a young plant, then let nature take its course. As the plant grows and fills the basket, tuck wayward stems behind the encircling wire. But be careful; these 3-foot-tall cones are not particularly stable. Indeterminate tomato vines can quickly grow beyond the top ring of the basket and topple the whole plant. It is best to use determinate tomato varieties with these cages or be prepared to brace them with stakes when the vines get larger.
To support indeterminate varieties, I prefer to make my own cages out of 5-foot-tall concrete reinforcing mesh that I buy at a home-supply store. Make sure the mesh is large enough to get your hand through while clutching a ripe tomato; a 6-inch-square meshwork for me and is readily available in stores. To make the cage, cut a 4½- to 6-foot-long piece, roll it together so the ends meet, then secure them with wire to make a cylinder with a diameter of 1½ to 2 feet. If you garden in a windy area, consider anchoring the cage to the ground with ground staples or stakes.
One drawback to using tomato cages is that they take up a lot of storage space in the off-season. With my homemade version, I can untie, unroll, and stack the wire, but that is somewhat inconvenient. If your storage space is limited, you might want to consider using circular or rectangular collapsible tomato cages that fold for easy storage.

| Determinate vs. indeterminate growth All tomato plants like to sprawl, some more than others. Depending on how much they sprawl, they fit into one of two categories: determinate or indeterminate. Determinate varieties grow to a specific height, then stop, and most of their fruit ripens all at once. Determinate tomatoes are beloved by people who have limited space and by canners who want to harvest just once.Indeterminate tomatoes will grow until frost or pure exhaustion kills them, and they produce fruit over a long season. In frost-free coastal California, I once saw a cherry tomato that grew through the winter and became so tall the owner could pick tomatoes from her second-story window. If a plant gets too big you can pinch the top out and it will stop growing up, although this can encourage it to send out more side shoots. |
Stakes allow for easier pruning
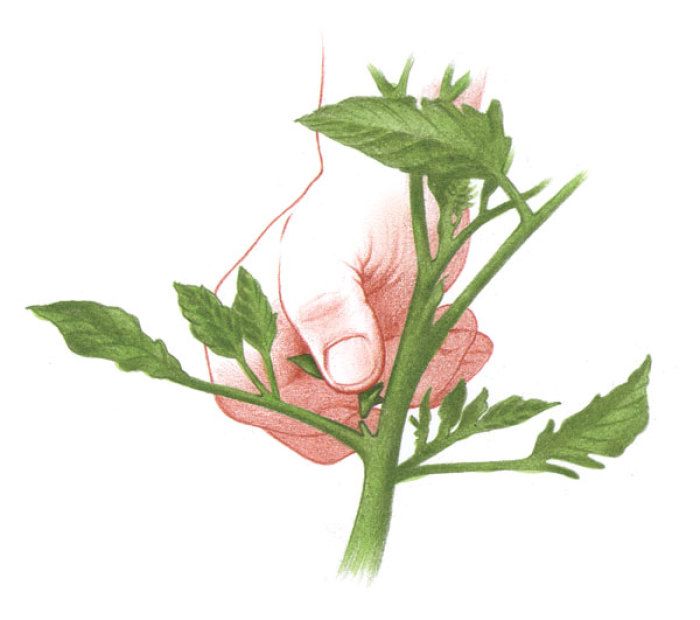
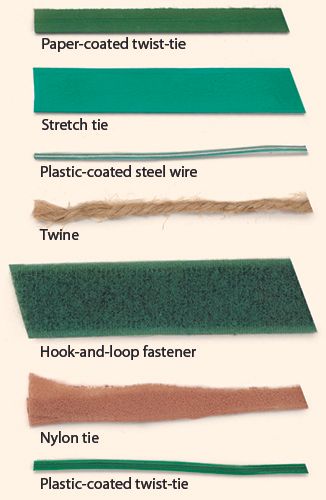
If you’re looking for earlier and bigger tomatoes and you don’t mind the extra work of pinching and tying up indeterminate varieties, you can stake them. Just drive a 6-foot redwood or cedar 2×2, a length of sturdy bamboo, or a metal T-post about a foot into the ground and plant your tomato about 6 inches away from the stake. As the vine grows, train it to a single stem by gently breaking off any side shoots that emerge from the main stem. Tie the stem loosely to the stake with strips of soft cloth or nylon. Loop the material entirely around the stake before tying it around the stem. This will cinch the tie and hold it in place as the plant gets heavier. If the ties start slipping down the stake as your tomatoes grow, you can notch the stake or drive a small nail in the stake to hold the ties up.
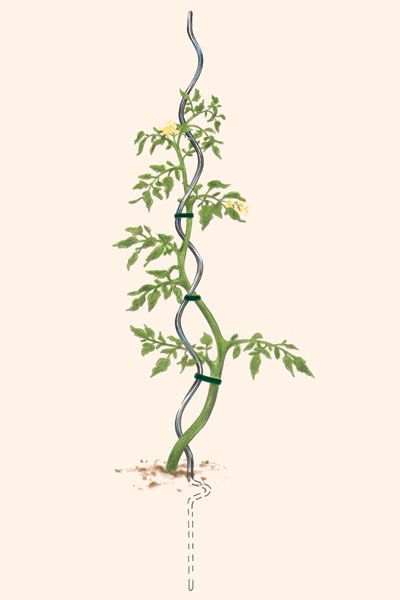
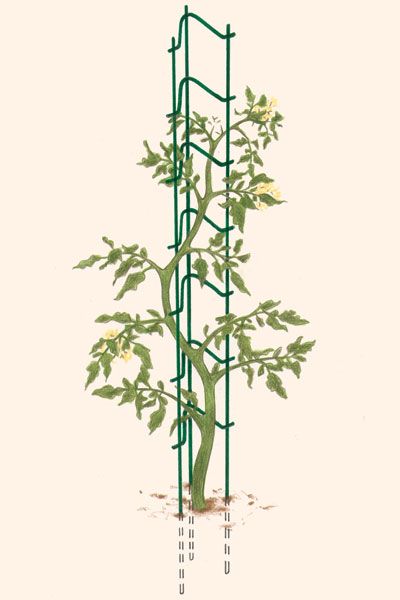
A tomato spiral is an elegant alternative to a rustic-looking stake. It is a 5-foot metal corkscrew-like device that you wind your plant around as it grows. You may not need to tie the plant up, but you will still want to pinch out any side shoots. Another attractive alternative to stakes is the tomato ladder, a half-cage that looks like a small ladder with V-shaped rungs. Plants grown on these ladders don’t need to be pinched into a single stem; as the plant grows, just tie the side shoots to the rungs.
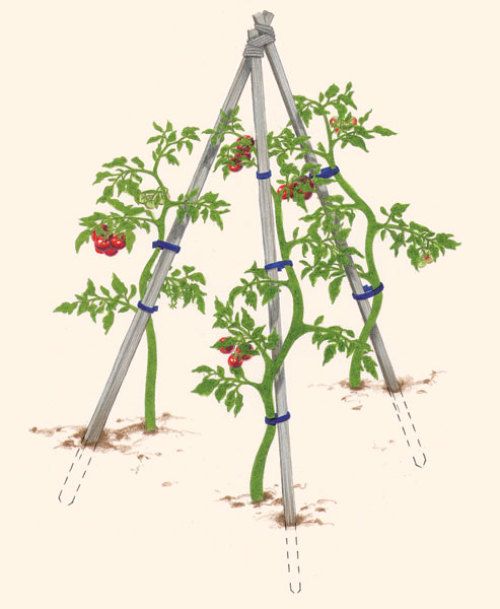
You could also build or buy a tripod or tuteur to provide upscale housing for your plants. You can either place a single plant in the middle of the tripod and train it to three or four main stems by keeping the lowest side shoots and pinching out the rest, or place a plant at the base of each leg of the tripod and train each plant to a single stem, which you would tie to that leg.


Try the Florida weave if you have lots of plants
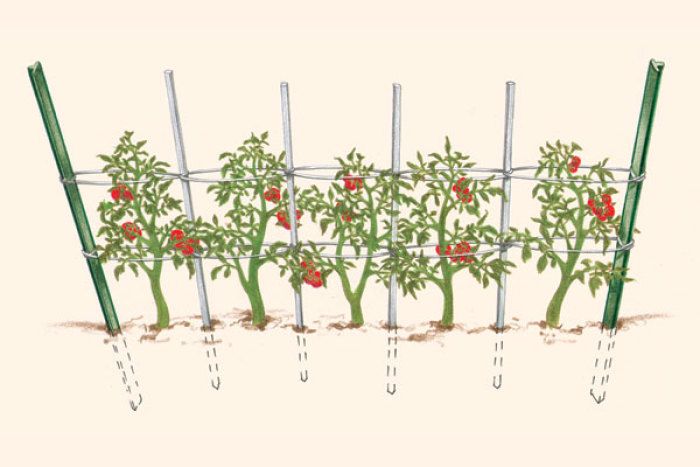
Because I usually grow a couple hundred tomato plants, I need to support them all quickly, easily, and inexpensively. To do this I use a staking method called the Florida weave for both my determinate and indeterminate varieties. I plant the tomatoes in rows, and at the ends of each row I drive steel T-posts into the ground at an oblique angle. Between the plants I push 8-foot-tall 1×1 redwood or bamboo stakes as far into the ground as I can, then push them in farther right after watering, when the soil is soft. As soon as the plants begin to lean over, I make the first layer of the weave by tying untreated twine around one T-post, passing it along one side of the first plant, wrapping it around the stake, then past the next plant, around the next stake, and so on. When I reach the T-post at the end of the row, I bring the twine back along the other side of the plants, repeating the process to hem them in so they are sandwiched between the lengths of twine.

I don’t need to prune plants trained this way; I just need to keep weaving and binding the stems with twine. I do this each time the plants grow a foot or so, which works out to about four times a season for indeterminate varieties and maybe twice for determinate ones. If the plants get too heavy with fruit and the whole row threatens to fall over, I stretch a strong wire between the T-posts and fasten the stakes to it. At the end of the season, I simply cut the twine, remove the stakes, and compost the remaining heap.
Although I often rely on the Florida weave method of support, I’ve used commercial contraptions, too. I’ve also resorted to creating free-form structures out of sticks, twine, and baling wire. In any case, keeping the fruits off the ground is my main goal, and trellising helps me find my Holy Grail of summer gardening: a basketful of perfect and perfectly ripe tomatoes.
Fine Gardening Recommended Products
Razor-Back Potato/Refuse Hook
Fine Gardening receives a commission for items purchased through links on this site, including Amazon Associates and other affiliate advertising programs.
Gardener's Log Book from NYBG
Fine Gardening receives a commission for items purchased through links on this site, including Amazon Associates and other affiliate advertising programs.

Chapin International 10509 Upside-Down Trigger Sprayer
Fine Gardening receives a commission for items purchased through links on this site, including Amazon Associates and other affiliate advertising programs.




Comments
Log in or create an account to post a comment.
Sign up Log in